

DIY Wooden Spice Rack: Complete Step-by-Step Tutorial for Kitchen Organization
Are you tired of digging through cluttered spice cabinets every time you cook? A wooden spice rack can transform your kitchen organization while adding natural beauty to your space. Building your own rak bumbu dapur dari kayu not only saves money but allows you to customize the design to fit your exact needs and kitchen aesthetic.
One thing our team at Sesoris keeps learning: every home has unique organization needs, no single solution fits all.
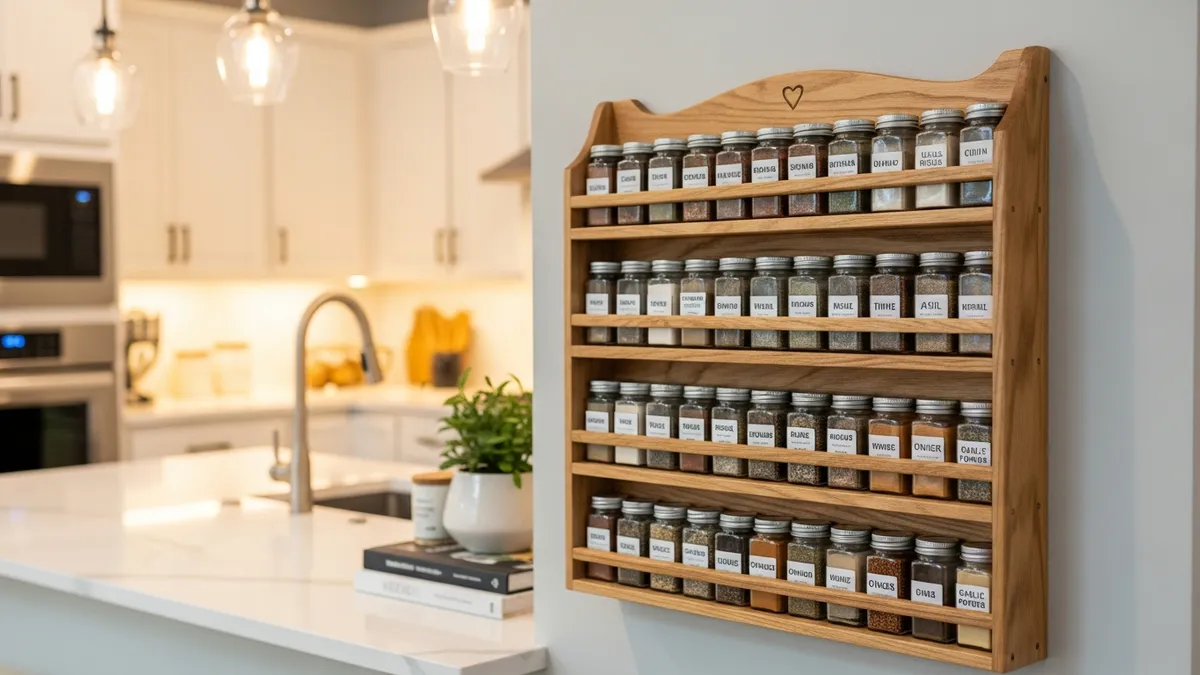
Creating a functional spice storage solution doesn't require professional carpentry skills. With basic tools and quality materials, you can craft a beautiful wooden spice rack that rivals expensive store-bought options. This comprehensive tutorial will guide you through every step, from selecting the right wood to the final installation.
Key Takeaways:
- Choose products with clear safety labels (food-grade, BPA-free) for daily use
- Investing slightly more in quality materials (glass, grade 304 stainless steel) saves long-term costs
- Match sizes to family needs, neither too large nor too small
- Local marketplaces like Tokopedia, Shopee, and Sesoris offer competitive prices with maintained quality
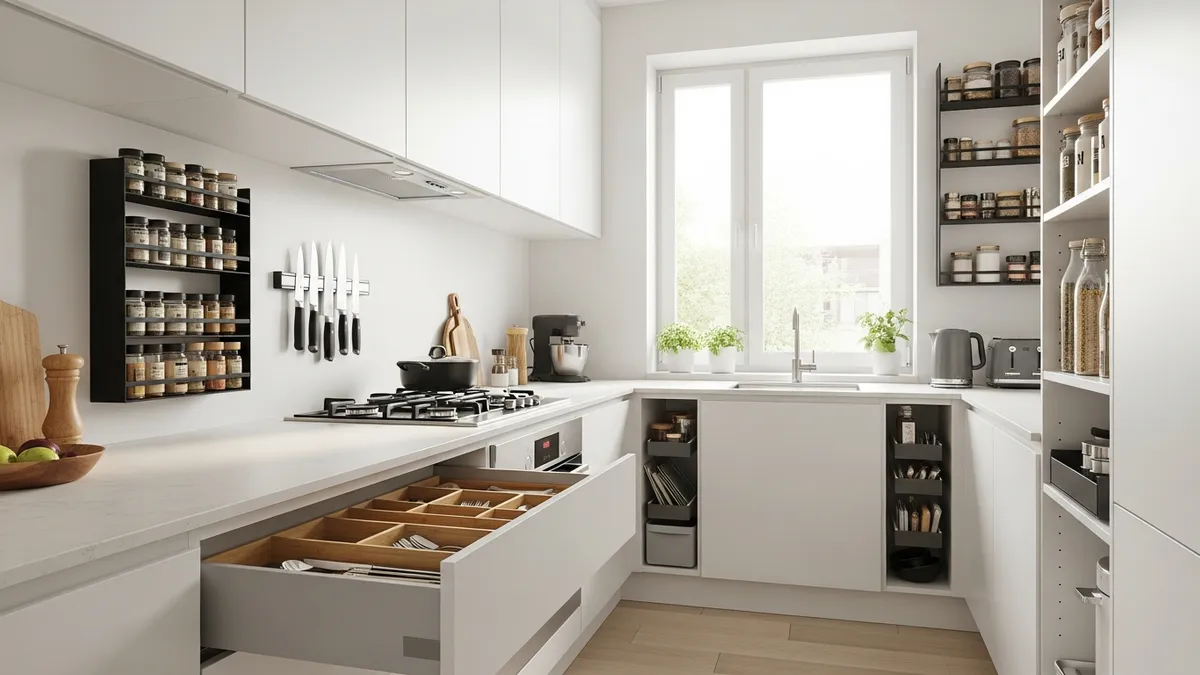
Why Choose Wood for Your Spice Rack?
Wood offers unique advantages for kitchen storage that make it the perfect material for spice organization. Unlike plastic alternatives, wooden racks provide durability that lasts for decades with proper care. The natural antimicrobial properties of certain woods help maintain a hygienic storage environment for your spices. For additional information, also see the guide from The Spruce.
Natural Beauty and Versatility
Wood complements any kitchen style, from rustic farmhouse to modern minimalist designs. The natural grain patterns create visual interest while maintaining a timeless appeal. You can easily customize the finish to match your existing cabinetry or create a beautiful contrast piece.
Environmental Benefits
Choosing wood over plastic demonstrates environmental responsibility. Quality wood comes from renewable sources and biodegrades naturally at the end of its lifecycle. This makes wooden spice racks an eco-friendly choice for conscious homeowners.
Essential Materials and Tools
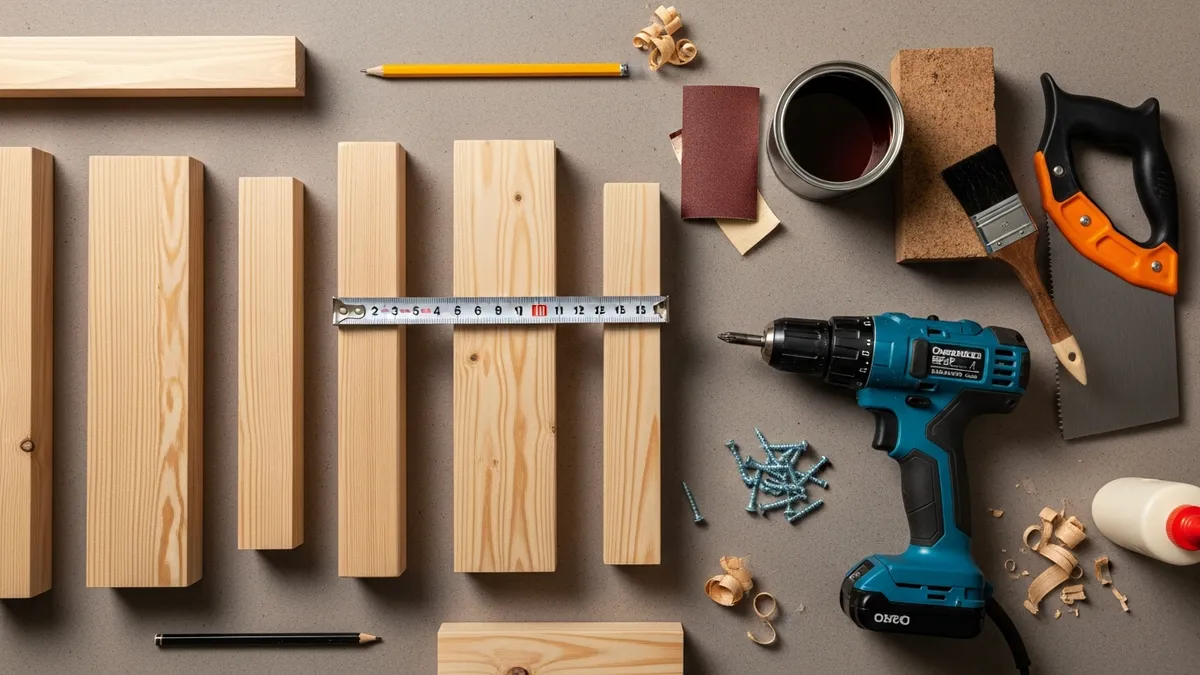
Success in any DIY project starts with gathering the right materials and tools. Here's your complete shopping list for building a three-tier wooden spice rack: For additional information, also see the guide from Real Simple.
Wood Materials:
- 1 piece pine board (1" x 4" x 36") for the back panel
- 3 pieces pine board (1" x 3" x 12") for shelves
- 2 pieces pine board (1" x 2" x 16") for side supports
- Wood glue for strong joints
- Wood screws (1.5" and 2.5" lengths)
Tools Required:
- Drill with bits
- Circular saw or miter saw
- Measuring tape and pencil
- Sandpaper (120 and 220 grit)
- Level for accurate installation
Finishing Supplies:
- Wood stain or paint of your choice
- Polyurethane finish for protection
- Brushes or rags for application
The total material cost typically ranges from $25 - $40 making this project incredibly budget-friendly compared to purchasing similar racks that cost $80 - $150
Step-by-Step Construction Process
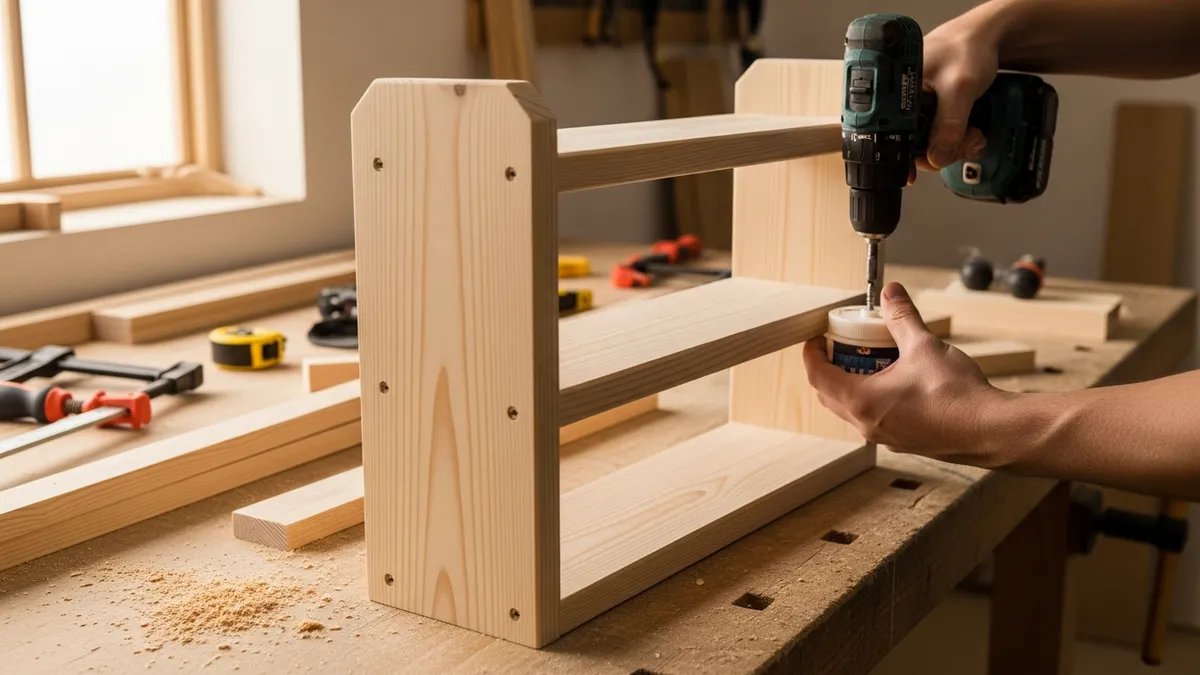
Step 1: Prepare Your Workspace
Set up a clean, well-lit workspace with adequate ventilation. Lay out all materials and ensure your tools are sharp and ready. Safety should be your first priority, wear safety glasses when cutting or drilling.
Step 2: Cut Wood to Size
Using your saw, cut all pieces according to your measurements. Sand each piece with 120-grit sandpaper, followed by 220-grit for a smooth finish. This preparation step is crucial for professional-looking results.
Step 3: Create the Shelf Framework
- Mark shelf positions on the back panel at 4-inch intervals
- Apply wood glue to shelf ends
- Attach shelves using 2.5" screws through the back panel
- Secure side supports with 1.5" screws
Step 4: Add Shelf Lips
Install small wooden strips along the front edge of each shelf to prevent spice jars from sliding off. This detail adds both functionality and visual appeal to your finished rack.
Step 5: Sand and Finish
Give the entire rack a final sanding with 220-grit paper. Apply your chosen stain or paint in thin, even coats. Allow proper drying time between applications for the best finish quality.
Professional Finishing Techniques
The finish you choose dramatically impacts both appearance and durability. For kitchen use, prioritize finishes that resist moisture and are food-safe when dry.
Staining Options:
- Natural oak stain highlights wood grain beautifully
- Dark walnut creates sophisticated contrast
- Clear sealers preserve natural wood color
Application Tips:
Apply stain with the grain using long, smooth strokes. Remove excess stain within 5-10 minutes to prevent blotchiness. Always test stain colors on scrap wood first to ensure you achieve your desired look.
For maximum durability, apply two coats of water-based polyurethane after staining. This creates a protective barrier against kitchen moisture and daily use while maintaining the natural wood beauty.
Common Mistakes to Avoid
Learning from others' mistakes saves time and frustration. Here are the most common pitfalls in DIY spice rack construction:
Measurement Errors
Always measure twice and cut once. Double-check that your spice jars will fit comfortably on each shelf before finalizing dimensions. Standard spice jars are typically 2.5-3 inches tall.
Inadequate Sanding
Rushing the sanding process results in poor finish adhesion and rough surfaces. Take time to properly sand all surfaces, paying special attention to cut edges and joints.
Poor Wood Selection
Avoid using treated lumber for kitchen projects, as chemicals may not be food-safe. Choose kiln-dried wood to prevent warping and ensure dimensional stability over time.
Installation and Mounting
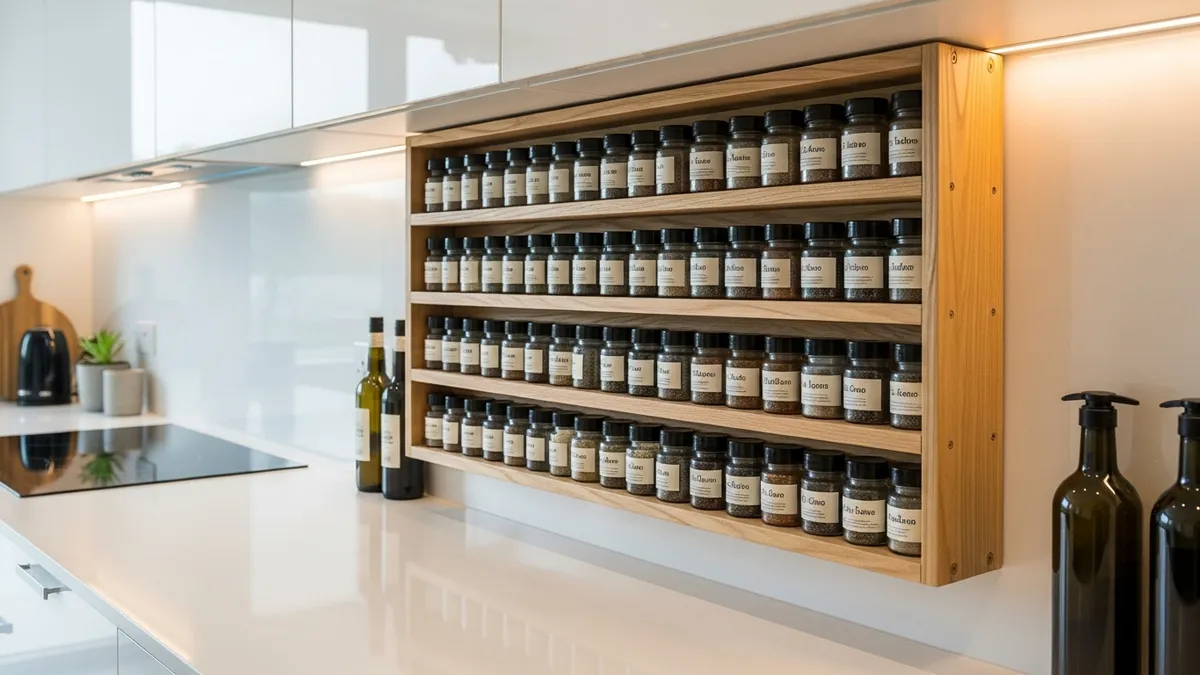
Proper installation ensures your spice rack serves you safely for years. Wall-mounted racks require secure attachment to wall studs, especially when loaded with spice jars.
Finding Wall Studs
Use a stud finder to locate solid mounting points. Mark stud locations clearly before beginning installation. If studs don't align with your desired placement, use heavy-duty wall anchors rated for at least 50 pounds.
Mounting Process:
- Hold rack in desired position and mark screw holes
- Pre-drill holes to prevent wood splitting
- Attach rack using 3" wood screws into studs
- Check level and adjust as needed
Height Considerations
Mount your rack 18-24 inches above countertop level for easy access while cooking. Ensure adequate clearance above the top shelf for removing tall spice containers.
Cost Analysis and Time Investment
Understanding the investment required helps you plan your project effectively. Here's a realistic breakdown of costs and time:
Material Costs:
- Wood materials: $20 - $30
- Hardware and screws: $5 - $8
- Finish materials: $10 - $15
- Total project cost: $35 - $53
Time Investment:
- Planning and measuring: 30 minutes
- Cutting and preparation: 2 hours
- Assembly: 1.5 hours
- Finishing: 3 hours (including drying time)
- Installation: 45 minutes
Total project time: 7-8 hours over 2-3 days
Compare this to purchasing a similar quality wooden spice rack at retail, which typically costs $80 - $150 and you'll save 50-70% while gaining valuable DIY experience.
Maintenance and Care
Proper maintenance extends the life of your wooden spice rack significantly. Regular care keeps it looking beautiful and functioning perfectly in your kitchen environment.
Daily Care:
Wipe down shelves with a slightly damp cloth to remove spice dust and cooking residue. Avoid harsh chemicals that can damage the wood finish or leave unsafe residues near food storage areas.
Monthly Deep Cleaning:
Remove all spice containers and clean each shelf thoroughly. Use a mixture of mild dish soap and warm water, followed by immediate drying to prevent moisture damage.
Annual Maintenance:
Inspect the finish for wear spots and apply touch-up stain or polyurethane as needed. Check mounting hardware for tightness and adjust if necessary. This preventive maintenance keeps your rack secure and attractive.
Design Variations and Customization
Once you master the basic construction technique, numerous customization options become possible. Consider these variations to match your specific needs and style preferences:
Size Modifications:
- Create a compact two-tier rack for small kitchens
- Build a larger five-tier version for extensive spice collections
- Design a corner unit to maximize awkward wall spaces
Functional Additions:
Add hooks underneath for measuring spoons or small utensils. Include a small drawer at the bottom for spice packets and seasoning mixes. Consider integrated lighting to illuminate your spice collection.
Style Variations:
Incorporate decorative brackets for Victorian charm, or keep lines clean and simple for modern aesthetics. Mix wood species for interesting color contrasts, or paint portions for a contemporary two-tone effect.
Related Articles
Explore other guides from Sesoris to complement your knowledge:
FAQ: Frequently Asked Questions About DIY Wooden Spice Racks
Q: What type of wood works best for kitchen spice racks?
Pine and poplar are excellent choices for beginners due to their affordability and ease of working. Oak and maple provide superior durability but require more advanced woodworking skills. Avoid pressure-treated lumber in kitchen applications.
Q: How much weight can a wooden spice rack safely hold?
A properly constructed and mounted three-tier rack can safely support 30-40 pounds when attached to wall studs. This accommodates 40-50 standard spice jars comfortably with safety margin.
Q: Can I build this without power tools?
Yes, though it requires more time and effort. Use a hand saw for cutting and a manual drill for pilot holes. Pre-cut lumber from hardware stores can eliminate much of the sawing work.
Q: How do I prevent spice jars from falling off shelves?
Install small lips (1/4" strips) along the front edge of each shelf. This prevents jars from sliding off while maintaining easy access for cooking. Some builders prefer slightly angled shelves for additional security.
Q: What's the best finish for kitchen use?
Water-based polyurethane provides excellent protection against moisture and daily wear while remaining food-safe when fully cured. Apply 2-3 thin coats for optimal durability and easy cleaning.
Conclusion
Building your own rak bumbu dapur dari kayu transforms both your kitchen organization and woodworking skills. This rewarding project delivers functional storage while adding natural beauty to your cooking space. The combination of cost savings, customization options, and personal satisfaction makes DIY wooden spice racks an excellent choice for homeowners seeking practical kitchen improvements.
Ready to start your next kitchen organization project? Explore our complete collection of kitchen storage solutions and home organization essentials at Sesoris. From modern storage containers to innovative organizers, we help you create the perfectly organized home you've always wanted.
About Tim Sesoris
The Sesoris editorial team consists of experienced writers in home organization, minimalist lifestyle, and Indonesian e-commerce. We test products, review market trends, and craft guides based on in-depth research and field experience. All recommendations are curated to give you accurate, practical, and relevant information for Indonesian households.
For questions or suggestions, contact us through the Sesoris contact page.
Weekly Home Tips
Get home organization ideas, product picks, and exclusive deals delivered weekly.
No spam. Unsubscribe anytime.


Explore More Articles
- Food Storage Containers with Lids: Complete Guide to Fresh Food Organization in 2026
- Glass Food Storage Containers Lids: Complete Guide to Replacement & Repair in 2026
- Pyrex Glass Food Storage Containers: The Complete Guide to Premium Kitchen Storage in 2026
- 25+ Creative Ideas for Closet Organization: Transform Your Storage Space in 2026
- Best Airtight Storage Containers for Food: Complete Guide to Fresh Food Storage in 2026
- Under Stairs Storage Ideas: Smart Ways to Transform Awkward Space in 2026
- Travel Organizer Bag: Ultimate Guide to Smart Packing & Effortless Travel in 2026
- Refrigerator Organizer: How to Arrange Your Fridge Neatly and Save Electricity