
How to Plan a Craft Storage Room That Actually Works: A Practical 2026 Guide
Plan a craft storage room that works in 2026. Practical layout tips, furniture picks, and zone strategies to organize every supply. Start here!
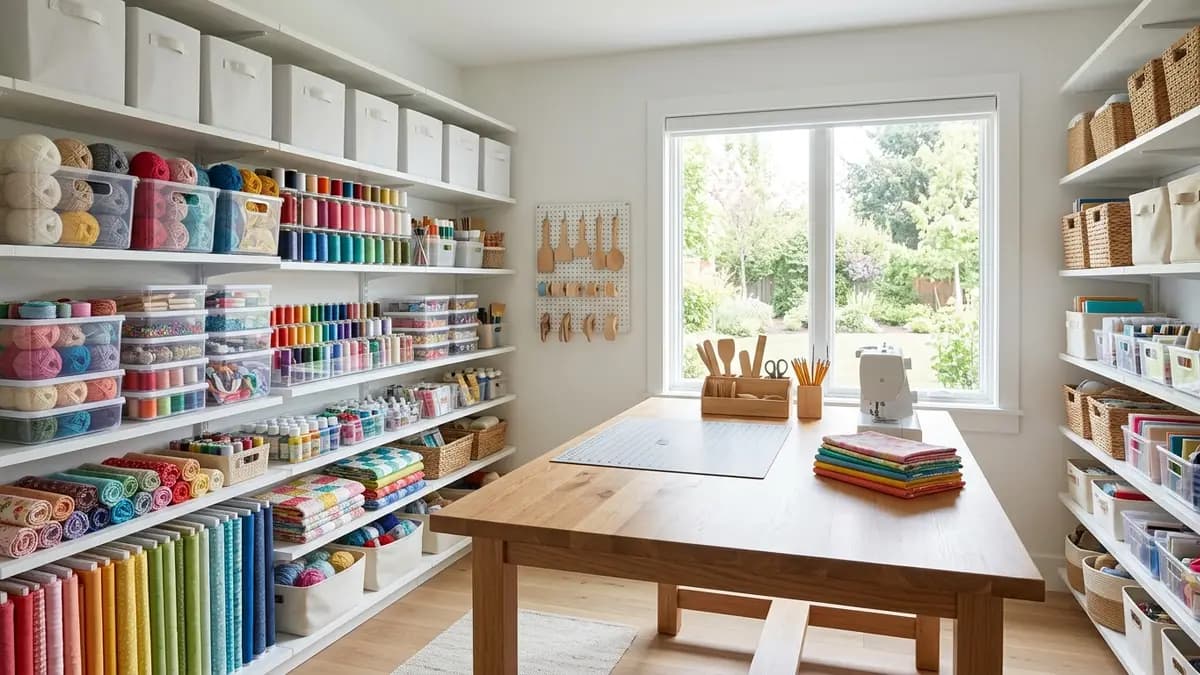
If you have ever dug through three boxes of ribbon to find a single spool of thread, you already know why a dedicated craft storage room is worth every ounce of planning effort. A craft storage room is more than a place to park your supplies - it is a functional workspace built around the way you actually create. When the space is designed thoughtfully, your projects start faster, your supplies stay in better condition, and you spend far less time hunting and far more time making. In 2026, home crafters are going beyond simply tossing bins on a shelf: they are applying the same systems thinking that professional organizers use in kitchens and garages to their creative spaces. This guide walks you through every practical step, from measuring your room to choosing the right storage furniture, so you can build a craft storage room that genuinely works for you.
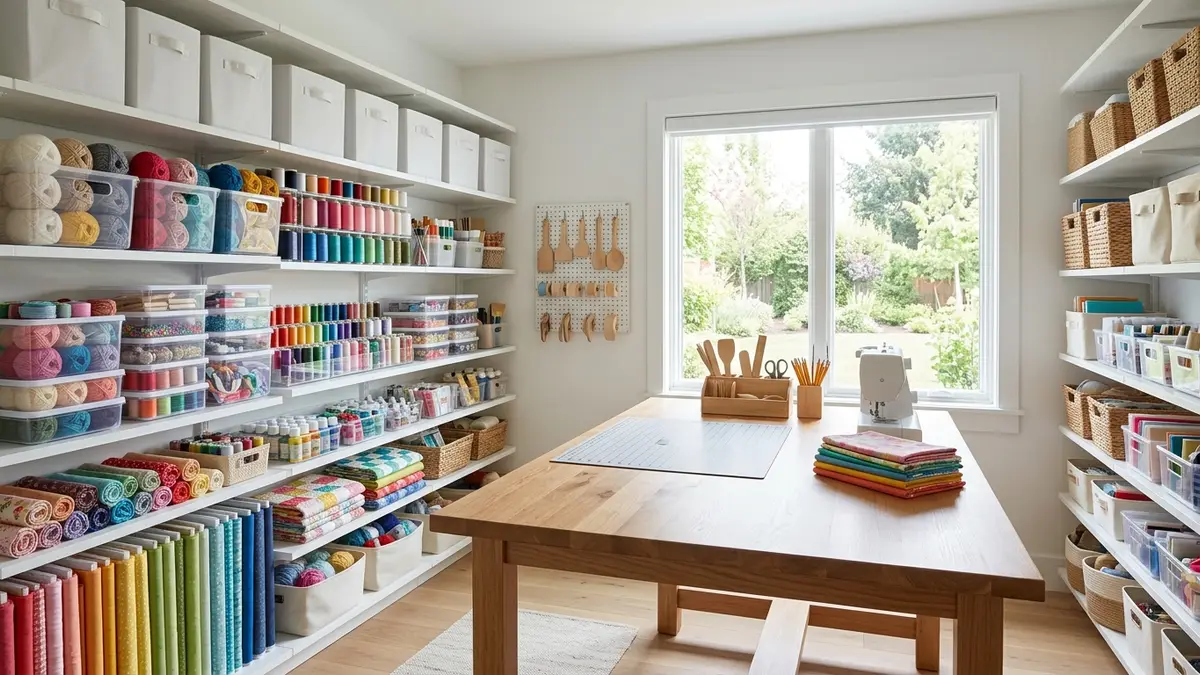
Why a Dedicated Craft Storage Room Changes Everything
Most crafters start out storing supplies in spare closets, under beds, or in a corner of the dining room. That approach works until it doesn't. Once your collection grows to include multiple disciplines - scrapbooking, sewing, painting, wrapping, card-making - scattered storage creates friction at every step. You waste time, you duplicate purchases because you can not see what you own, and creative momentum stalls the moment you can not find a tool.
A purpose-built craft storage room solves these problems by centralizing every supply in a space designed around your workflow. According to The Spruce, one of the most common mistakes crafters make is prioritizing decoration over function. A beautiful room that makes it hard to find a glue stick is still a dysfunctional room. The practical approach means thinking about retrieval first and aesthetics second - although the two are absolutely not mutually exclusive.
There is also a real mental benefit. Research in environmental psychology consistently connects organized, dedicated workspaces with improved focus and creative output. When your craft storage room is set up correctly, it signals to your brain that this is a space for making things, and that mental shift alone can increase how often you actually use it.
Start with a Thorough Supply Audit Before You Buy Anything
The single most important step in planning a craft storage room is completing a full inventory of your supplies before you purchase one shelf, bin, or drawer unit. This sounds obvious, but most people skip it and end up with storage systems that do not match the actual volume or type of items they own.
Here is a reliable audit process to follow:
- Pull every craft supply out of every location - closets, bags, bins, drawers - and pile everything in one room.
- Sort supplies into broad categories: paper goods, fabric and fiber, adhesives, cutting tools, paint and ink, embellishments, and hardware.
- Within each category, sort further. Paper goods might break into cardstock, patterned paper, notebooks, and cardboard. Fabric might separate into yardage, fat quarters, trims, and interfacing.
- Measure the volume of each sub-category. How many linear feet of fabric do you have? How many bottles of paint? How deep are your paper stacks?
- Note the dimensions and weight of your heaviest items - large rolls of wrapping paper, reams of cardstock, full bottles of mod podge - because these dictate shelf depth and weight rating.
- Identify frequency of use. Supplies you reach for daily need to be at counter height or on open shelves. Supplies you use seasonally can go in overhead cabinets or on high shelves.
This audit typically takes two to four hours, but the information it produces is the foundation for every storage decision you make afterward. Do not skip it.
How to Design Zones in Your Craft Storage Room
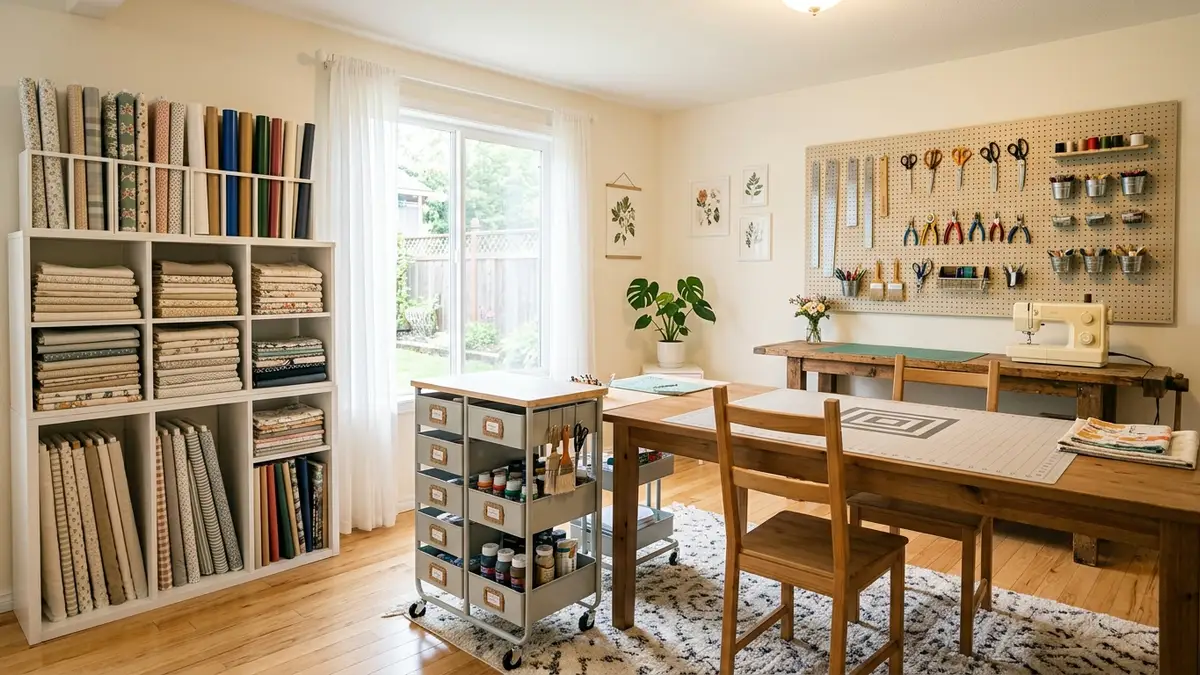
Zone planning is the organizing principle that separates a functional craft storage room from a room that just has stuff in it. A zone is a defined area of the room dedicated to a specific activity or supply type. When zones are well-designed, you complete tasks without crossing the room repeatedly, and everything has a clear home.
The Core Zones Most Craft Rooms Need
The Work Surface Zone is the heart of the room. This is where you cut, assemble, stamp, sew, or paint. The work surface needs to be large enough to spread out your current project, sturdy enough for cutting pressure, and at a height appropriate for your primary activity. Standing-height surfaces (around 36 inches) work well for cutting and pinning fabric. Seated-height surfaces (around 29 to 30 inches) are better for detailed paper crafts and painting. If you do both, consider a table with adjustable legs or two separate surfaces.
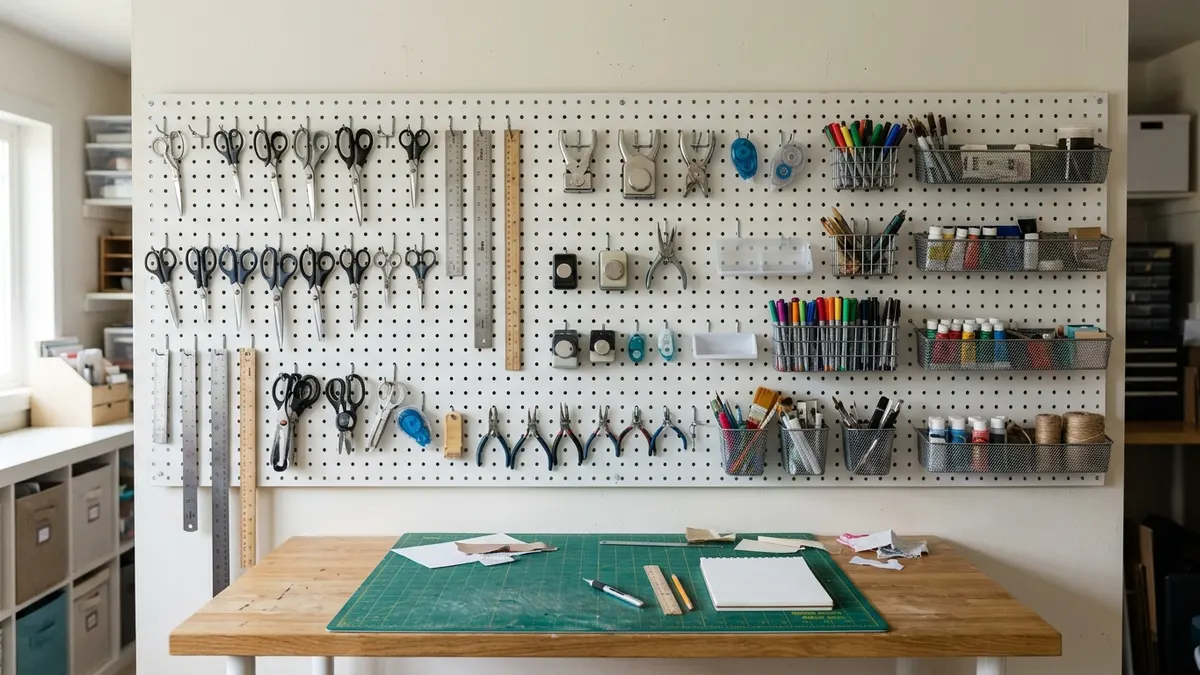
The Tool Zone holds scissors, rotary cutters, rulers, punches, and any other hand tools you use frequently. A pegboard wall is the classic solution here, and for good reason: it keeps tools visible, accessible, and off your work surface. Mount the pegboard directly above or beside your main work area. Use a combination of metal hooks, small wire baskets, and horizontal ledges to accommodate different tool shapes.
The Paper and Flat Goods Zone requires vertical storage. Paper stored horizontally in deep stacks warps and is nearly impossible to sort through. Instead, use vertical file sorters, magazine holders, or open-front paper organizers to store cardstock, patterned paper, and large paper pads upright. Label each slot by color or pattern family so you can pull exactly what you need at a glance.
The Fabric and Fiber Zone is where yardage, fat quarters, yarn, ribbon, and trim live. Fabric does best when folded or rolled around cardboard boards and stored vertically in open cubbies so you can see the print and color from the front. Yarn can be stored in clear bins organized by weight or color. Ribbon is best wound on bobbins or dowels and stored in a shallow drawer or wall-mounted spool holder.
The Consumables Zone covers adhesives, paint, ink, and other supplies that get used up. Clear bins organized by type work well here because you can instantly see when a product is running low. Grouping all adhesives together - glue sticks, tape runners, liquid adhesive, hot glue sticks - means you always go to one spot when you need to stick things together.
The Project in Progress Zone is frequently overlooked and critically important. Every crafter has projects that span multiple sessions. Having a dedicated spot - a rolling cart, a flat drawer, or a labeled bin - for your current work-in-progress prevents it from spreading across every surface in the room.
Choosing the Right Furniture for a Craft Storage Room
Once you know your zones and the volume of each supply category, you can choose furniture that actually fits your needs. Here are the most useful furniture types and what to look for in each.
Open Cube Shelving
Modular cube shelving is arguably the most versatile option for a craft storage room. Each cube can hold a fabric bin, a clear stackable box, a paper organizer, or a standalone decorative piece. The modular nature means you can reconfigure the layout as your supplies change. Look for units rated to hold at least 25 pounds per cube, with a depth of 12 to 13 inches for standard storage bins and up to 15 inches for deeper fabric bolts.
Tall Open Shelving with Adjustable Shelves
Floor-to-ceiling open shelving maximizes vertical space, which is especially valuable in smaller rooms. Adjustable shelves are non-negotiable - your storage needs will change as your supply collection evolves, and fixed shelves quickly become limiting. Aim for shelves at least 10 to 12 inches deep for bins and containers, and 15 to 18 inches deep for shelves holding larger items like paper trimmers or sewing machines.
Rolling Carts with Drawers
A rolling cart earns its place in almost every craft storage room. The ability to wheel a cart directly to your work surface, use what you need, and then roll it back to its storage position reduces the number of trips you make across the room. Multi-tier carts with small drawers are ideal for organizing embellishments, stamps, ink pads, and other small items that tend to scatter.
A Dedicated Cutting Table or Large Worktable
If you sew, quilt, or work with large sheets of paper, a dedicated cutting table with storage underneath is one of the best investments you can make. Look for tables with built-in drawers or open shelving below the surface. Some crafters place a butcher block or thick plywood top on top of a base unit of cabinets or drawers, which creates a durable, customized cutting surface with integrated storage.
Wall-Mounted Storage
Beyond pegboards, consider wall-mounted shelves for displaying frequently used supplies or for storing items you want to keep visible. Floating shelves at varying heights can hold jars of brushes, small plants for inspiration, or a row of labeled spice-jar-style containers with beads and buttons. Wall-mounted storage keeps the floor clear, which makes the room feel larger and easier to clean.
According to Houzz, craft rooms that use a combination of open shelving and closed storage tend to feel most organized because they balance visual accessibility with the ability to conceal clutter behind cabinet doors when needed.
Craft Storage Room Strategies for Small Spaces
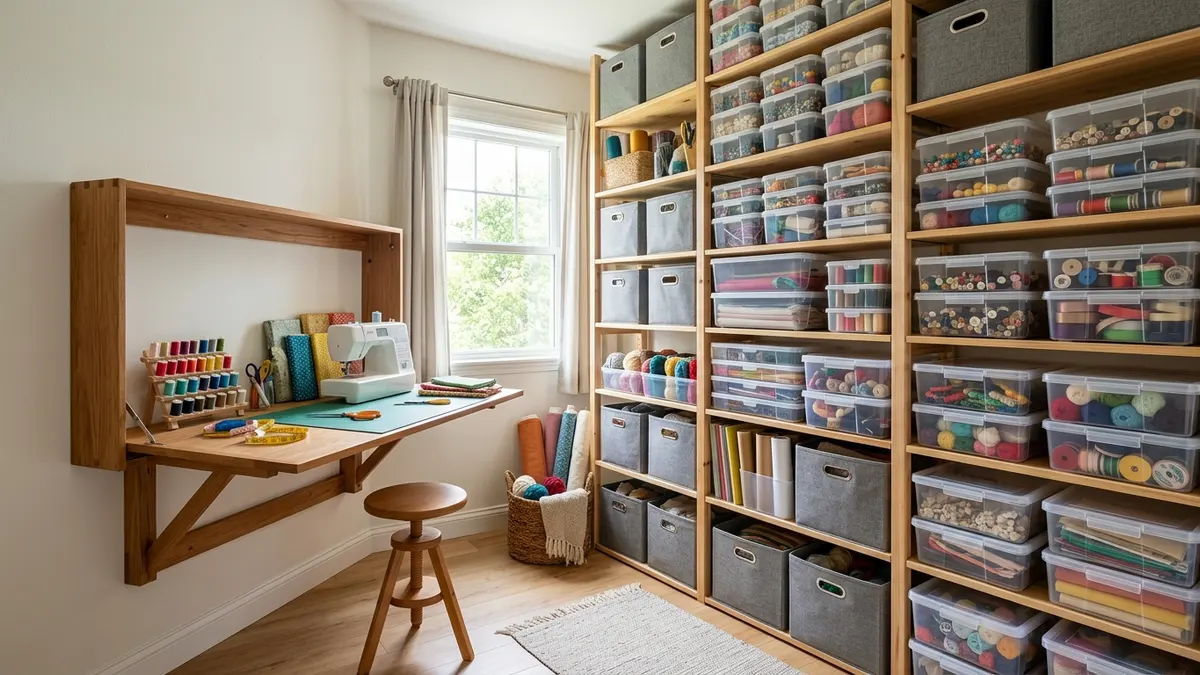
Not everyone has a dedicated room to spare. Many crafters are working with a spare bedroom that doubles as a guest room, a basement corner, or even a large closet converted into a craft nook. The good news is that a craft storage room does not have to be large to be functional - it just has to be intentional.
Go vertical first. In a small space, floor space is precious. Tall shelving units that reach within a few inches of the ceiling multiply your storage capacity dramatically without eating additional floor area.
Use fold-down or murphy-style work surfaces. A fold-down table mounted to the wall can provide a generous work surface when you need it and fold flat when you do not, freeing the room for other uses. Some versions include built-in shelving and pegboard above the fold-down surface, creating a complete craft station that closes up like a cabinet.
Choose dual-purpose furniture. An ottoman with storage inside can hold bulky fabric. A bench at the base of a shelving unit can hold oversized bins while providing a place to sit. A rolling cart that fits under your work table stores supplies during sessions and tucks away completely when the room needs to serve another purpose.
Use the back of the door. Over-door organizers with clear pockets are ideal for storing small supplies - washi tape rolls, glue sticks, small scissors, paint tubes - in a space that would otherwise go unused.
Label everything twice as carefully in a small space. When storage is dense and compact, labels become even more important because you can not see into every container at a glance. Consistent, readable labels on the front of every bin and drawer reduce the time you spend searching.
The Labeling and Categorization System That Makes It All Work
A craft storage room with great furniture and poor labeling still fails. The labeling system is what transforms a collection of bins and shelves into a system you can actually navigate - especially when you are mid-project and need to find something quickly.
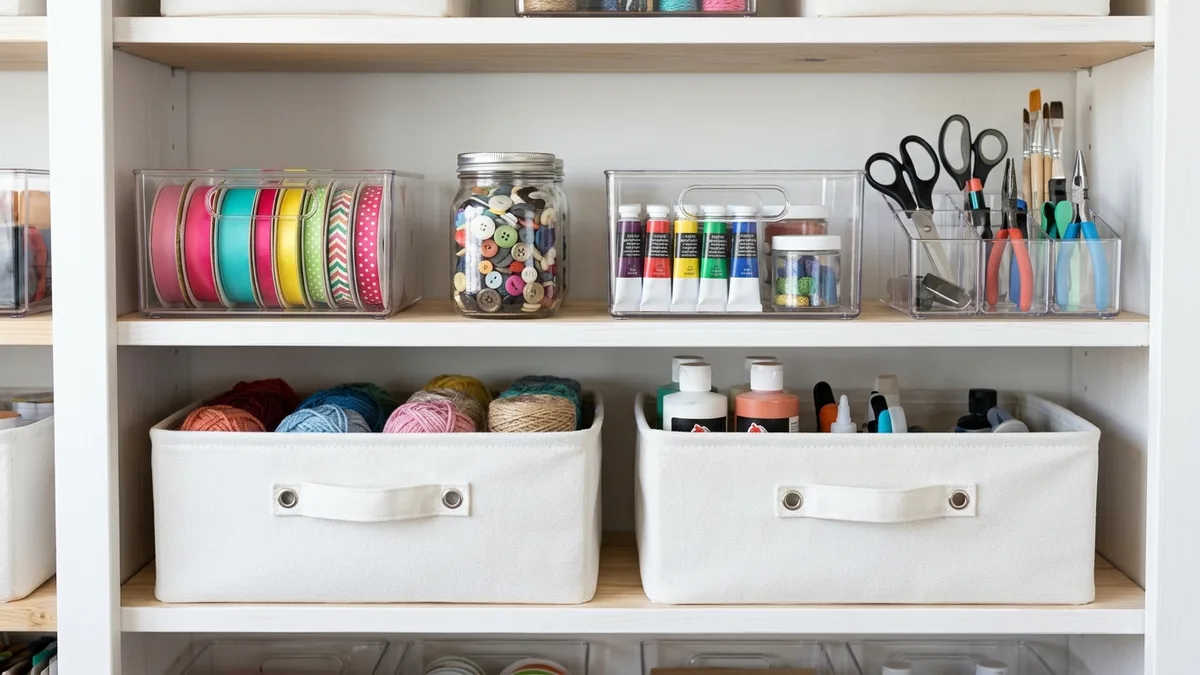
Here are the principles that make a labeling system genuinely useful:
Use consistent label formats. Printed labels from a label maker or home printer look cleaner than handwritten labels and hold up better over time. Choose one font, one size, and one label shape for your entire room. Consistency makes the system easier to read at a glance.
Label at the category level, not the item level. A label that says "washi tape" is more useful than labels for every individual roll. Label the bin or section, and let the visual of the contents speak for the specifics.
Use a color-coding layer. Assign a color to each major supply zone or category. Color-coded bin labels, colored tape on shelf edges, or uniformly colored bins by zone help you navigate the room faster without reading every label.
Label both the bin and the shelf position. If a bin gets moved during a project, a label on the shelf position reminds you exactly where it belongs when you put it back. This is the trick that keeps a system working long-term rather than degrading over time.
For a deeper look at label systems that work across the whole home, the Sesoris guide to storage bin labels covers printable templates and organizational approaches that transfer well to a craft storage room.
Maintaining Your Craft Storage Room Over Time
Setting up a craft storage room is a one-time project. Maintaining it is an ongoing practice. The two most common reasons craft rooms fall back into chaos are accumulated supplies without a home and completed projects that never get cleared out.
Build these habits into your routine:
Do a ten-minute reset at the end of every session. Before you leave the room, return every tool and supply to its designated spot. This single habit prevents the slow accumulation of clutter that turns an organized room into a messy one.
Conduct a quarterly supply audit. Every three months, spend twenty minutes checking your consumables zone. Toss dried-out markers, consolidate half-used bottles of the same adhesive, and note what you need to restock. This keeps the room functional and prevents duplicates from piling up.
Adopt a one-in, one-out rule for tools. Craft tools accumulate quickly. When you buy a new cutting tool or punch, evaluate whether an old one can be donated or sold. Keeping tool quantities matched to your actual tool storage prevents overflow.
Reassign zones when your crafting focus changes. If you spent the last two years sewing but have recently shifted to watercolor painting, your room's zones should shift too. A semi-annual reassessment of how you actually use the space keeps the layout aligned with reality rather than what you planned two years ago.
According to Real Simple, the most organized people are not people who never make messes - they are people who have systems that make it easy to clean up. That principle applies perfectly to a craft storage room: the setup should make tidying up as effortless as possible.
Craft Storage Room Products Worth Considering
The right products make a significant difference. Here are the categories of storage products that consistently earn high marks in functional craft rooms:
Clear stackable bins with lids are ideal for protecting paper goods, fabric, and embellishments from dust while keeping contents visible. Look for bins that stack securely and have lids that seal without requiring a tool to open - you need quick access during a project.
Shallow drawer units are perfect for flat items like stamps, stencils, die cuts, and paper punches. Items stored in shallow drawers are immediately visible when the drawer opens, without stacking.
Uniform labeled fabric bins for cube shelving create a cohesive look while keeping bulky supplies contained. Bins with handles are worth the small additional cost because they make pulling a bin off a high shelf much easier and safer.
Pegboard kits with a range of hooks, baskets, and ledge accessories are the most space-efficient tool storage solution available. A 2-foot by 4-foot pegboard can hold a remarkable number of tools when the accessories are chosen thoughtfully.
Rolling carts with small drawers in a 3-tier or 4-tier configuration provide portable, flexible storage that can adapt to different projects and positions in the room.
You can browse a curated selection of home organization containers and storage solutions at Sesoris - many of the bin styles, clear containers, and modular storage pieces that work well in kitchens and pantries translate directly to a well-organized craft storage room.
For broader inspiration on how storage systems work across different room types, the Sesoris blog covers organization strategies for every room in the home.
Related Products from Sesoris
If you want to turn this guide into a real setup, start with Stackable Storage Bins, 24 Pack and Pull-Out Cabinet Organizer, 17 in. Wide. For broader options, browse the Home & Decor collection so the article journey does not stop at reading only.
Our practical rule: choose one product that solves the main clutter problem first, then add supporting organizers only when the daily workflow is already clear. This keeps the shopping path useful, not pushy.
FAQ: Craft Storage Room Planning Questions Answered
Q: How much space do I actually need for a functional craft storage room?
You can build a functional craft storage room in as little as a large closet - roughly 5 feet by 7 feet - if you maximize vertical space and use a fold-down work surface. A dedicated spare bedroom of 10 feet by 10 feet or larger gives you the freedom to include a full-size worktable, multiple storage zones, and comfortable movement between them. The key is not the size of the space but the intentionality of the layout.
Q: Should I use open shelving or closed cabinets in a craft storage room?
A combination of both works best for most crafters. Open shelving makes frequently used supplies visible and immediately accessible, which speeds up your workflow. Closed cabinets or bins with lids protect supplies you use less often from dust and light, and they give the room a tidier appearance when you have guests or when the room doubles as a guest space. Aim for roughly 60 to 70 percent open storage and 30 to 40 percent closed storage as a starting point.
Q: How do I store large items like cutting mats and fabric bolts in a craft storage room?
Cutting mats should be stored flat to prevent warping - a shallow drawer or a dedicated flat slot under a work surface is ideal. For fabric bolts, vertical storage in open cubbies or on dowels keeps the fabric from compressing and lets you see the print from the front. Large rolls of wrapping paper or kraft paper can be stored in tall paper storage tubes or in a dedicated tall bin near your wrapping station.
Q: What is the best way to organize small embellishments like buttons, beads, and brads?
Small embellishments need individual compartments to stay organized and usable. Options include compartmentalized tackle boxes or bead organizer cases with removable dividers, small glass or plastic jars stored upright in a shallow drawer, and multi-compartment storage cases designed for small parts. Clear containers are strongly preferred because they eliminate the need to open every container to find what you need.
Q: How do I keep a craft storage room organized when multiple family members use it?
Assign each person their own clearly labeled section or shelf. Color-coding by user is especially effective in shared spaces - each person's supplies are in their designated color of bin or label. Establish a shared rule that supplies are returned to their zone before leaving the room, and do a collective ten-minute reset at the end of any shared session.
Conclusion: Build a Craft Storage Room That Supports Your Creativity
A well-planned craft storage room is not a luxury - it is the infrastructure that makes consistent, enjoyable creating possible. By starting with a thorough supply audit, designing intentional zones, choosing furniture matched to your actual inventory, and building a consistent labeling system, you create a space that supports your creativity rather than fighting against it. Whether you are working with a dedicated room, a spare bedroom corner, or a converted closet, the principles in this guide apply at every scale.
Ready to start building your ideal setup? Explore the Sesoris collections for versatile storage bins, clear containers, and organization products that work as well in a craft storage room as they do anywhere else in your home. And if you want more room-by-room organization inspiration, the full Sesoris blog has practical guides for every space. Live more organized - starting with the room where you create.
Liked this guide?
Get new organizing guides and the occasional new product by email. No spam, unsubscribe anytime.
Related articles

Explore more articles
- Multi-Purpose Spice Racks: Ultimate Guide to Versatile Kitchen Storage Solutions in 2026
- Aluminum Dish Cabinets: Strength Meets Style in Modern Kitchen Storage
- 30+ Creative Kitchen Counter Organizer Ideas to Transform Your Cooking Space in 2026
- Steel Wire Dish Racks: Strong and Economical Kitchen Storage Solutions
- IKEA Garage Storage Solutions: Complete Guide to Organizing Your Garage in 2026
- 35 Creative Wall Shelf Storage Ideas to Transform Your Home Organization in 2026
- Wooden Spice Racks for Kitchen: Ultimate Guide to Natural Storage Solutions 2026
- Plastic Storage Boxes: How to Choose and Use