
How to Organize Your Bedroom Closet Step by Step: Complete Tutorial for a Tidy, Functional Wardrobe in 2026
Learn how to organize your bedroom closet step by step in 2026. Follow this practical tutorial to create a tidy, functional wardrobe you'll love every day.
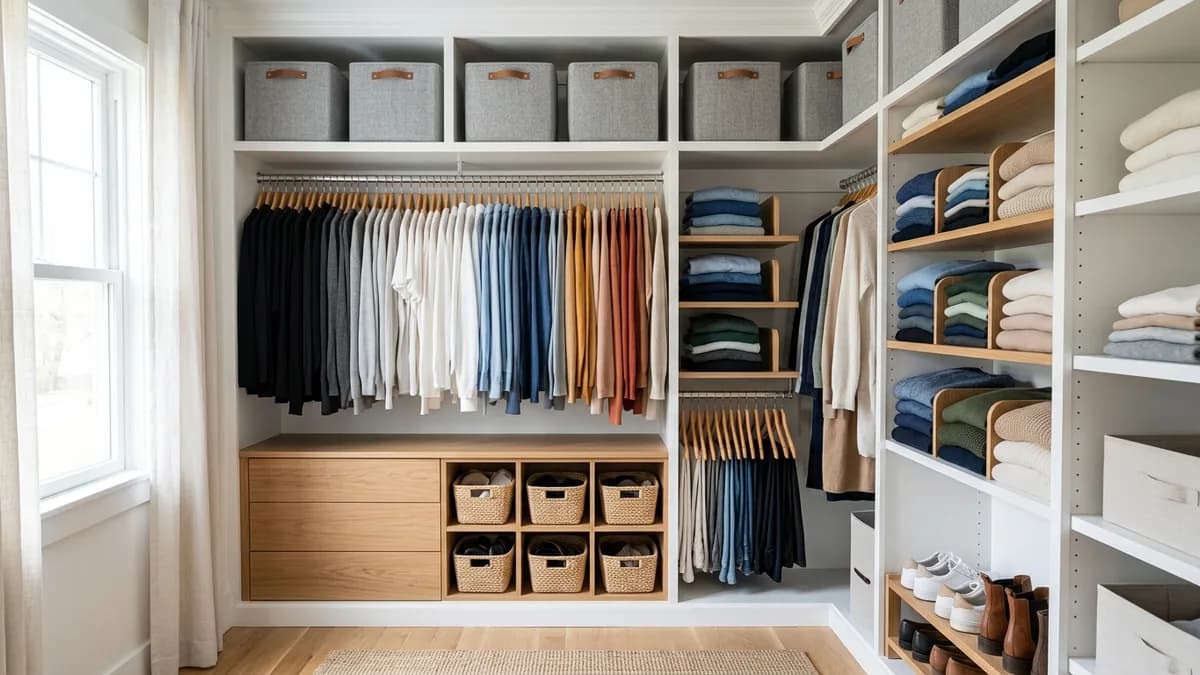
If you have ever opened your bedroom closet and felt a wave of stress wash over you, you are not alone. A disorganized wardrobe can eat up precious morning minutes, make it harder to see what you own, and turn getting dressed into a frustrating chore. The good news? Learning how to organize your bedroom closet step by step is completely achievable, even if your current situation looks like a fabric avalanche. This complete 2026 tutorial walks you through every stage of the process, from the initial clear-out all the way to the final maintenance habits that keep things tidy for good. Whether you have a small reach-in or a roomy walk-in, these practical steps will help you build a wardrobe system that actually works for your real life.
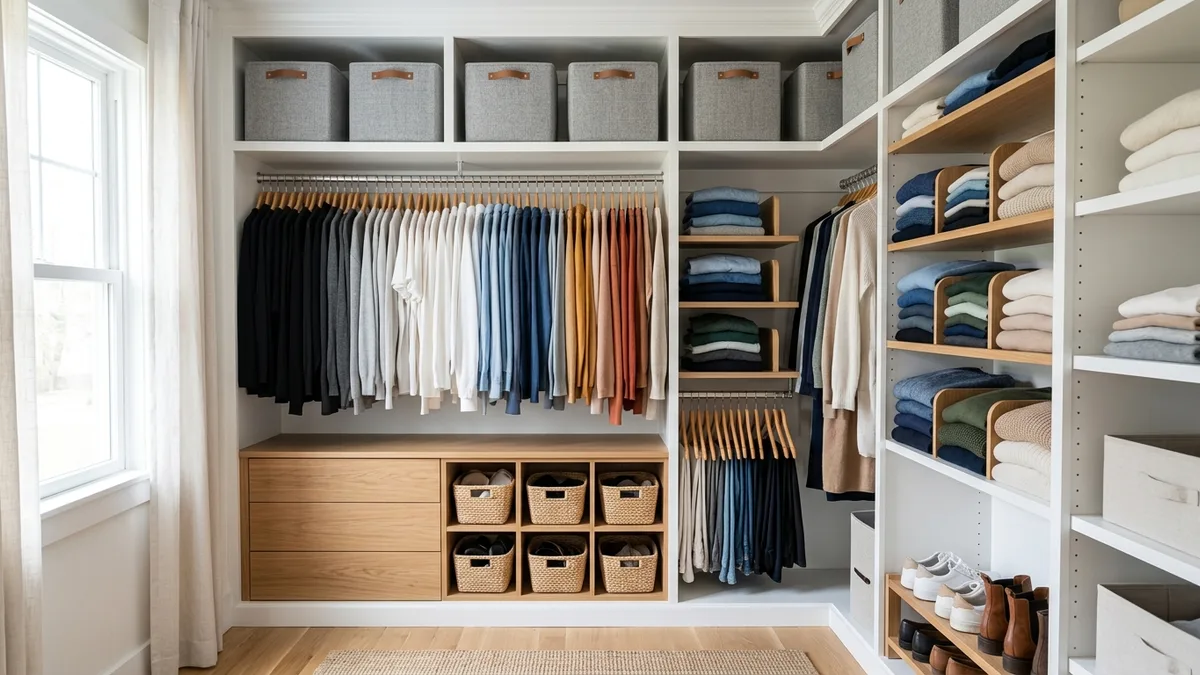
Why a Step-by-Step Approach to Bedroom Closet Organization Matters
Jumping straight into buying organizers without a plan is one of the most common mistakes people make. You end up with a cart full of bins and dividers that do not fit your space or your clothing volume. A structured, step-by-step approach saves you time, money, and frustration. According to The Spruce, the most successful closet transformations start with a thorough edit before any products are purchased. That principle sits at the heart of this tutorial.
A step-by-step process also helps you stay focused. Closet organization can feel overwhelming when you try to tackle everything at once. Breaking it into clear phases makes each stage manageable and gives you visible progress to celebrate along the way. By the end of this guide, you will have a bedroom closet that not only looks great but functions as a genuine time-saving system every single morning.
Step 1: Gather Your Supplies Before You Start
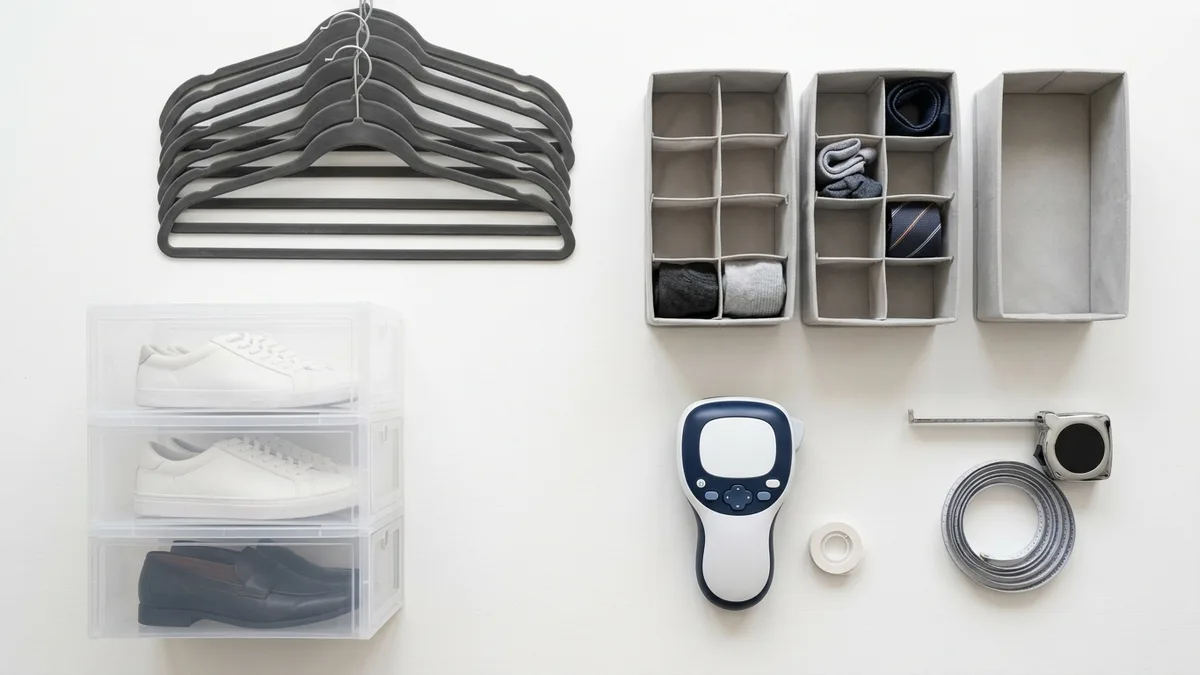
Before you pull a single item out of your closet, set yourself up for success by gathering everything you need. Having the right tools on hand prevents mid-project trips to the store that kill your momentum.
What You Will Need
- Heavy-duty trash bags for discards and donations
- Sticky notes or masking tape to label temporary piles
- A measuring tape to record your closet dimensions
- Velvet slim hangers to replace bulky plastic ones and instantly double your hanging space
- Clear stackable shoe boxes so you can see your footwear at a glance
- Fabric storage bins with labels for folded items and accessories
- Shelf dividers to keep folded stacks from toppling
- A label maker or printable labels for bins and baskets
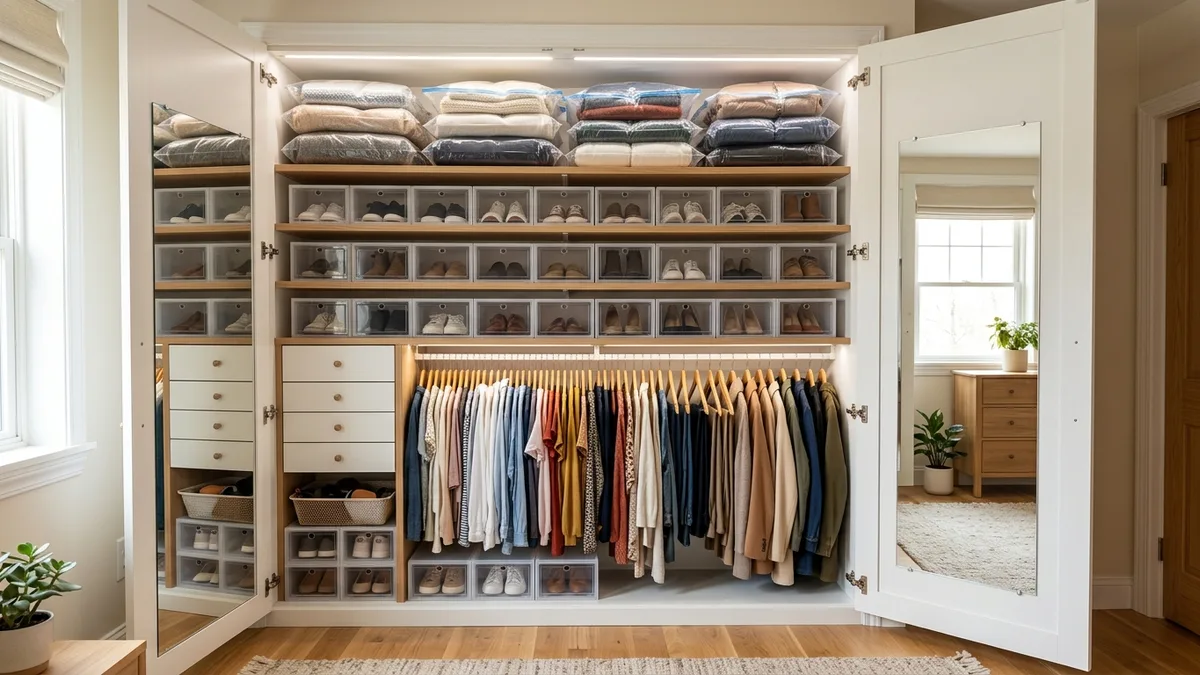
- Vacuum storage bags for off-season bulky items like sweaters and comforters
You can find a curated selection of closet organization tools at Sesoris, including fabric bins, shelf dividers, and storage solutions sized for real American bedrooms.
Step 2: Empty the Entire Closet Completely
This step feels dramatic, but it is non-negotiable. Pull absolutely everything out of your closet and place it on your bed or a clean area of your bedroom floor. Seeing every single item you own in one place is genuinely eye-opening. Most people discover duplicate items they forgot about, clothes that no longer fit, and accessories they have not seen in years.
Emptying the closet completely also gives you the opportunity to wipe down shelves, vacuum the floor, and check for any damage like loose rods, cracked shelves, or peeling paint. A clean slate makes the rebuilding process far more satisfying.
Pro Tip: Do This on a Day Off
Schedule your closet organization project for a day when you have at least four to six uninterrupted hours. Rushing through the process leads to shortcuts that undermine the final result. Put on a podcast or playlist you enjoy and treat it as a productive self-care project.
Step 3: Declutter Using the Three-Pile Method
With everything out of the closet, it is time for the most important step: deciding what stays and what goes. The classic three-pile method is simple and effective.

Pile 1: Keep. These are items you love, wear regularly, and that fit you well right now, not the version of you from three years ago.
Pile 2: Donate or Sell. Clothing in good condition that you simply do not wear anymore. These deserve a second life with someone else.
Pile 3: Discard. Items that are stained, torn, stretched out, or otherwise beyond saving. Let them go without guilt.
As you sort, Good Housekeeping recommends asking three questions for each item: Do I love it? Do I wear it? Does it fit me today? If the answer to any of these is no, it belongs in pile two or three.
Step 4: Measure Your Closet and Plan Your Layout
Now that you know exactly what you are keeping, grab your measuring tape. Record the following dimensions:
- Total width of the closet interior in inches
- Height from floor to ceiling in inches
- Depth from the back wall to the door frame in inches
- The height of any existing fixed shelving or rods
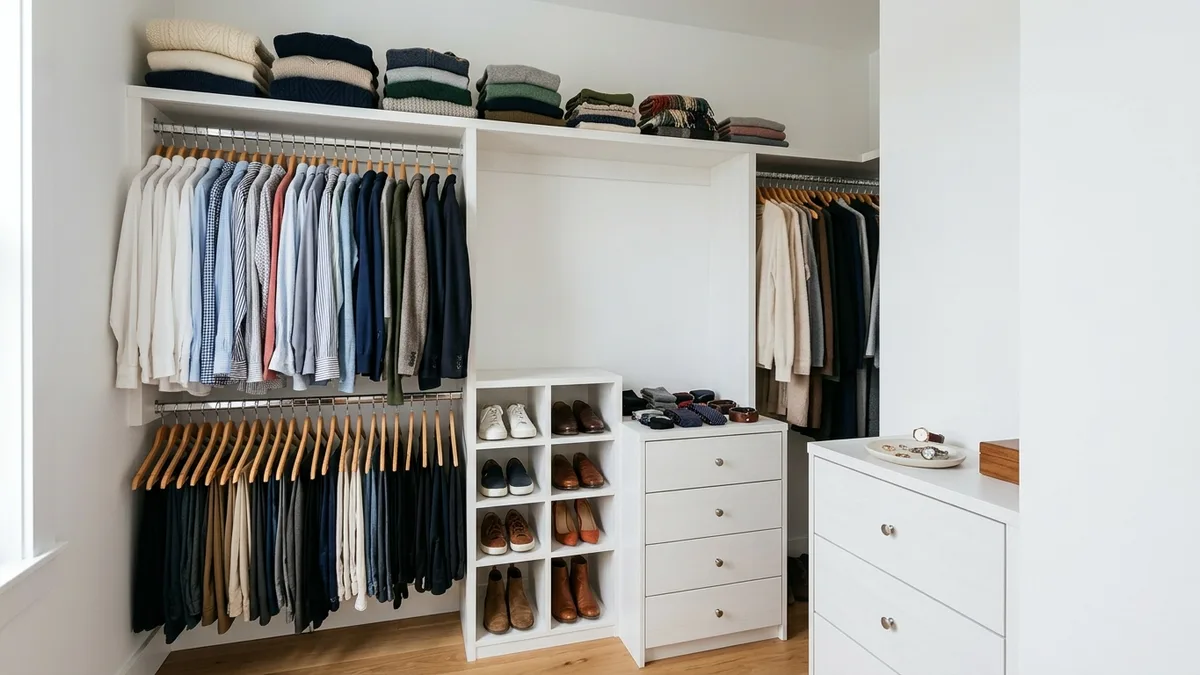
With these numbers in hand, you can plan a layout that maximizes every inch. A typical reach-in closet is around 24 inches deep and 60 to 72 inches wide. A standard single hanging rod sits at about 66 to 68 inches from the floor, which wastes a lot of the space below shorter items like jackets and folded shirts.
Closet Layout Ideas by Clothing Type
- Long hanging zone: For dresses, coats, and full-length pants. Needs at least 60 to 70 inches of vertical clearance.
- Double hanging zone: For shirts, blazers, and folded pants. Two rods stacked with roughly 40 inches of clearance each dramatically increases your hanging capacity.
- Shelf zone: For folded sweaters, jeans, and accessories. Shelves spaced 12 to 16 inches apart work well for most folded items.
- Shoe zone: Floor level or on a low dedicated shelf. Clear stackable boxes or open cubbies make retrieval quick and easy.
- Drawer or bin zone: For small accessories, belts, scarves, and socks.
If you are working with a small reach-in, check out our guide on Bedroom Storage Solutions for Small Bedrooms for space-maximizing layouts specifically designed for compact spaces.
Step 5: Install or Adjust Your Closet System
Once you have a layout plan, it is time to make any physical changes to your closet. This might involve:
- Adding a second hanging rod below an existing one using a rod extender or a simple additional bracket and rod.
- Installing additional shelving using wall-mounted brackets and boards, or a modular shelf kit.
- Adding a small freestanding drawer unit on the floor for accessories and folded basics.
- Mounting hooks on the back of the door for bags, belts, or jewelry organizers.
You do not need a professional closet company to create a functional system. Many of the most effective bedroom closet upgrades involve simple hardware-store additions combined with the right organizational products. For a deeper dive into building your own storage components, our DIY Closet guide covers the full process with step-by-step instructions.
A well-planned closet layout does more for your mornings than any single organizational product. Design the space around your actual habits, not an idealized version of how you wish you dressed.
Step 6: Return Items to the Closet with Intention
This is where the real transformation happens. Do not just stuff things back in. Return each category of clothing and accessories to its designated zone with purpose.
Hanging Clothes Organization Tips
- Switch all your hangers to slim velvet ones. This single change can recover 30 to 40 percent more rod space in a typical closet.
- Hang clothes by category first, then by color within each category. The classic order: jackets and blazers, then shirts and blouses, then pants, then dresses.
- Face all hangers the same direction. After you wear an item and return it, face it the opposite way. After a few months, any hanger still in the original position tells you that item has not been worn and may be a candidate for donation.
Folded Clothes Organization Tips
- Use the file-folding method (also called the KonMari fold) for items stored in drawers or bins. Stand items upright rather than stacking them flat so you can see every piece at a glance.
- Group like items: all T-shirts together, all workout gear together, all loungewear together.
- Use shelf dividers between stacks of folded sweaters and jeans to prevent toppling.
Shoe Organization Tips
- Store shoes in clear stackable boxes with a photo or label on the front so you can identify each pair instantly.
- Keep your most-worn shoes at eye level or easily accessible on the floor.
- Move out-of-season footwear to a higher shelf in clear boxes.
For more shoe storage ideas that work inside a wardrobe, our Closet Shoe Storage Ideas guide has 20 creative approaches to every shoe collection size.
Step 7: Organize Accessories, Bags, and Small Items
Accessories are notorious closet clutter culprits because they lack a natural home. This step gives everything a designated spot.
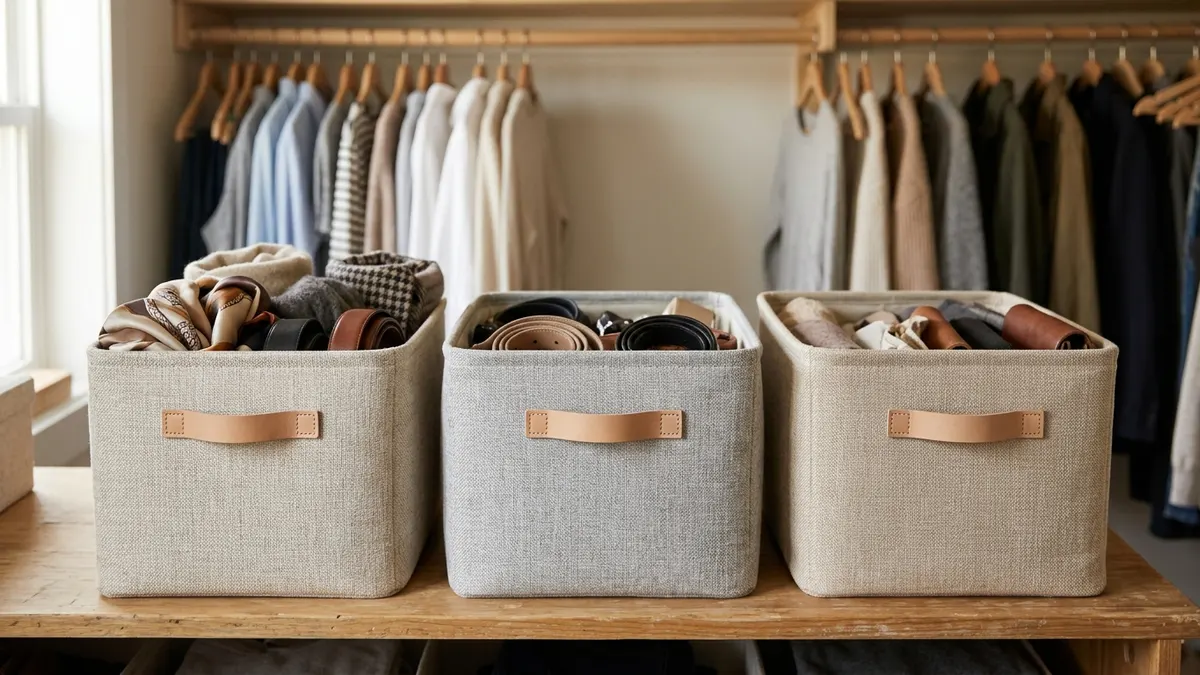
Accessories by Category
- Belts: Roll them and store in a small fabric bin, or hang them on a belt rack or door hook.
- Scarves and wraps: Fold and store in an open-top bin on a shelf, or hang them on a multi-scarf hanger.
- Jewelry: Use a small wall-mounted jewelry organizer on the inside of the closet door, or a tabletop jewelry tray on a shelf.
- Handbags: Store upright on a shelf with small shelf dividers between each bag, or use S-hooks on a rod to hang them by their straps. Stuff bags with tissue paper to help them hold their shape.
- Hats: Stack baseball caps on a hat rack or hang them on hooks. Keep structured hats in hat boxes on the top shelf.
For inspiration on keeping your handbag collection tidy, see our Purse Storage Ideas for Small Spaces article.
Step 8: Handle Seasonal Items and Off-Season Storage
One of the biggest closet space wasters is storing all four seasons of clothing in the same active space. Rotating your wardrobe seasonally is a game-changer for everyday functionality.
How to Rotate Seasonal Clothing
- Identify what is currently out of season. In October 2026, that means summer dresses, lightweight shorts, and sandals.
- Wash and completely dry everything before storing it. Storing clothing with any moisture or body oils can cause fabric damage over time.
- Pack out-of-season items into vacuum storage bags to compress bulky items and protect them from dust and pests. These bags are especially effective for sweaters, comforters, and heavy coats during warm months.
- Store vacuum bags on the top shelf of your closet, under your bed, or in a hallway closet.
- Bring in your current-season wardrobe from wherever it was stored.
According to Houzz, a seasonal rotation immediately makes your active closet feel more spacious and helps you get dressed faster because every item visible is one you can actually wear right now.
Step 9: Label Everything for Long-Term Success
Labels are the unsung heroes of any organization system. They communicate the purpose of each bin, basket, and shelf zone to everyone in the household, including future you after a long day when you are tempted to just toss things wherever.
Labeling Best Practices
- Use a label maker for a clean, consistent look that is easy to read.
- Label the front of each fabric bin with its contents: "Workout Tops," "Casual Tees," "Scarves," and so on.
- If you share the closet with a partner, use color-coded labels or different bin colors for each person's items.
- Label shelf zones with a small framed sign or a strip of washi tape and a marker if you want a lower-cost option.
Our Label Organizer guide explains how to create a complete labeling system for your entire home, not just your closet.
Step 10: Establish Maintenance Habits to Keep It Organized
The most beautifully organized closet in the world will revert to chaos within weeks if you do not build habits to maintain it. These daily and weekly practices take just a few minutes but protect months of effort.
Daily Habits
- Return items to their designated spot immediately after wearing or washing them. Do not leave clean laundry on the bed or chair overnight.
- Spend two minutes each evening doing a quick visual scan and tucking anything out of place back where it belongs.
Weekly Habits
- Do a five-minute reset every Sunday. Pull out anything that has crept into the wrong zone and put it back correctly.
- Check the donation bag you keep on the closet floor or door. When it is full, drop it off.
Monthly and Seasonal Habits
- Do a mini-declutter once a month. If you notice items that have not moved in several weeks, reconsider whether they belong in your active wardrobe.
- Perform your full seasonal rotation at the transition between summer and fall, and again between winter and spring.
- Wipe down shelves and vacuum the closet floor once a month to keep the space fresh.
Building these habits is much easier when your closet system is logical and every item has a clear home. If you find yourself constantly fighting the system, that is a signal to reassess your layout rather than your discipline. Our Morning Routine Organization guide shows how a well-organized closet connects to a calmer, more productive start to every day.
Common Bedroom Closet Organization Mistakes to Avoid
Even with the best intentions, certain missteps can undermine your results. Here are the most common pitfalls and how to sidestep them:
- Buying storage products before decluttering. Always edit first. You need to know exactly how much you are keeping before you can buy the right-sized bins.
- Ignoring the back of the door. The inside of a closet door is prime real estate for hooks, pocket organizers, and jewelry storage. Use it.
- Mixing seasons in your active zone. Keeping all four seasons of clothes in one reachable area makes everything harder to find and the space more cramped.
- Using mismatched hangers. Mixed hanger types create visual chaos and waste space. Committing to one slim hanger style throughout makes a surprisingly large difference.
- Skipping labels. Without labels, organization systems gradually break down as items drift from their designated zones.
- Over-organizing infrequently used items. Spend the most organizational energy on the things you access daily. Items you use rarely can live in less accessible spots without detailed organization.
Related Products from Sesoris
If you want to turn this guide into a real setup, start with Stackable Storage Bins, 24 Pack and Pull-Out Cabinet Organizer, 17 in. Wide. For broader options, browse the Home & Decor collection so the article journey does not stop at reading only.
Our practical rule: choose one product that solves the main clutter problem first, then add supporting organizers only when the daily workflow is already clear. This keeps the shopping path useful, not pushy.
FAQ: Frequently Asked Questions About How to Organize Your Bedroom Closet
Q: How long does it take to organize a bedroom closet from scratch?
For a typical reach-in bedroom closet, expect to spend four to six hours on the full process, including decluttering, measuring, and returning items. A large walk-in closet may take a full weekend. Breaking it into two sessions, one for decluttering and one for installing and organizing, can make it feel more manageable.
Q: What is the best way to organize a small bedroom closet?
Maximize vertical space by adding a second hanging rod for shorter items. Use the back of the door for hooks and a shoe organizer. Choose slim velvet hangers and store off-season items under the bed in flat storage containers. Our Small Closet Organization Ideas guide has 30 specific ideas for compact spaces.
Q: Do I need to buy an expensive closet system to get organized?
Not at all. Many of the most effective bedroom closet transformations are achieved with a second hanging rod (often under US$20), a set of slim velvet hangers (typically US$15 to US$25 for a pack of 50), and a few fabric bins (around US$5 to US$15 each). A modular closet system can enhance the results further, but it is by no means required for a functional, organized wardrobe.
Q: How do I keep my closet organized long-term?
The key is to assign a specific home for every single item and commit to returning things there immediately after use. A weekly Sunday reset of five to ten minutes prevents gradual drift from taking hold. Doing a seasonal rotation twice a year also keeps the active zone manageable and clutter-free.
Q: What should go on the top shelf of a bedroom closet?
The top shelf is best used for items you access infrequently: out-of-season clothing in vacuum bags, extra bedding, hat boxes, or luggage. Keep everyday items at eye level or below for the most convenient access.
Q: How do I organize a closet I share with a partner?
Divide the space clearly into two distinct zones, one for each person. Use color-coded labels or different bin colors. Give each person their own hanging rod section. Discuss and agree on shared zones, such as a shared shelf for extra bedding, so there is no ambiguity about what belongs where.
Conclusion
Learning how to organize your bedroom closet step by step is one of the highest-return home projects you can tackle. A well-organized wardrobe saves you time every single morning, reduces daily stress, helps you care for your clothing better, and makes your entire bedroom feel calmer and more intentional. By following this 2026 tutorial, from the initial supply gathering and full empty-out, through the declutter, layout planning, installation, and final return of items, you are building a system that is designed around your real wardrobe and your real daily habits. And with the right maintenance habits in place, the results last far beyond the day you complete the project.
Ready to get started? Browse the full range of bedroom organization tools, fabric bins, shelf dividers, and storage solutions at Sesoris. Check out our Best Sellers for the most popular closet organization products, explore our New Arrivals for the latest 2026 storage solutions, or browse all Collections to find the perfect system for your bedroom. Live More Organized starts with the space where every day begins.
Liked this guide?
Get new organizing guides and the occasional new product by email. No spam, unsubscribe anytime.
Related articles
Explore more articles
- 20+ Best Outdoor Plant Shelf Ideas to Elevate Your Patio & Garden in 2026
- 25+ Best Nightstand Organization Ideas to Transform Your Bedroom in 2026
- Small Linen Closet Organization: 20+ Smart Tips to Maximize Every Inch in 2026
- 25+ Best Book Storage Ideas for Small Spaces to Maximize Every Inch in 2026
- Office Supplies Organization Ideas for Desks
- 30+ Best Office Desk Setup Ideas to Build a Productive Workspace in 2026
- 25+ Best Bathroom Storage Cabinet Ideas to Maximize Every Inch in 2026
- 20+ Best Hidden Toy Storage Ideas to Keep Your Home Tidy in 2026