
RV Shoe Storage Ideas for Safer Travel
Plan safer RV shoe storage with compact layouts, secure bins, ventilation, moisture control, and clear access to exits and daily gear.
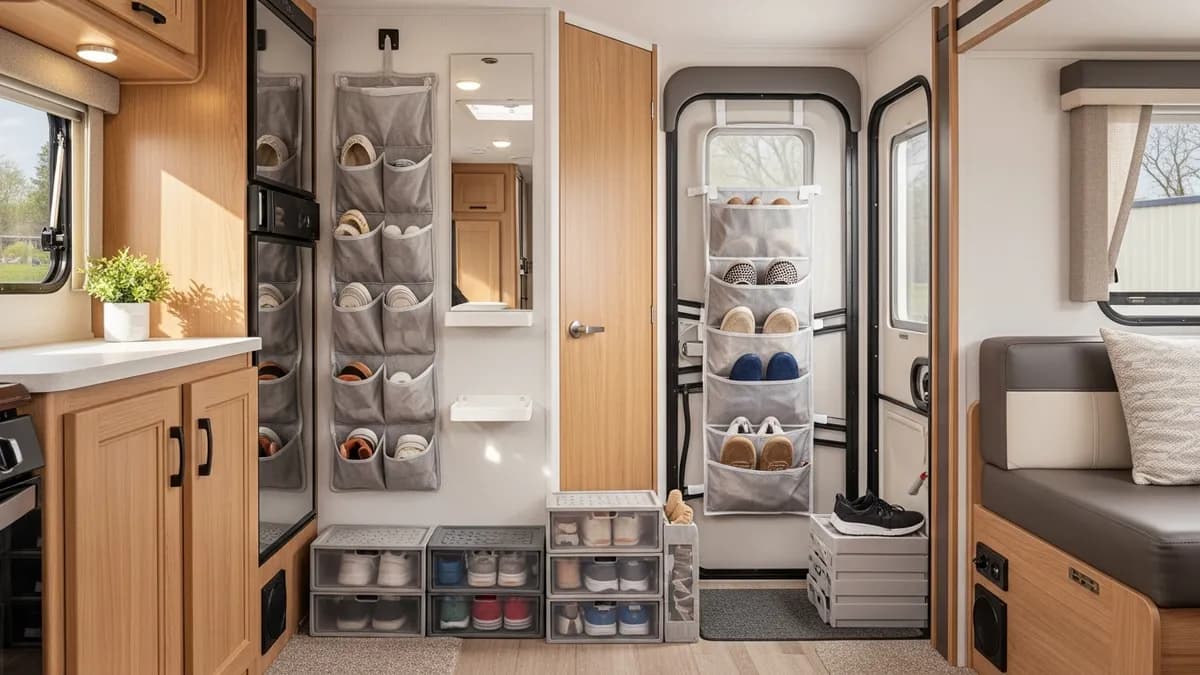
The best RV shoe storage ideas do three things at once: keep the walkway clear, hold footwear securely while the rig moves, and let damp shoes dry before they enter an enclosed bin. Start with a small tray or washable tote near the main door for daily pairs, then place occasional footwear in a secured under-bed or wardrobe container. Keep heavy boots low, preserve access to every door and emergency window, and treat any freestanding rack as parked-mode equipment unless it is positively restrained for travel. This guide explains how to build that system around your actual floor plan rather than buying a rack and hoping it fits.
Shoe storage ideas for RVs must work at camp and in a moving vehicle. The goal is not maximum capacity. Carry the pairs your trip needs, give each one a defined home, and make the travel reset easy to repeat.
For related planning, compare this mobile setup with the permanent zones in our garage shoe storage ideas, the vertical approaches in shoe storage for a small closet, and the drop-zone logic in small entryway shoe storage ideas.
Start With Three RV Shoe Zones
A workable system separates footwear by use instead of forcing every pair into one organizer. Use these three zones:
- Active zone: one current pair per traveler near the primary entrance. A shallow, washable tray, low pocket, or secured tote keeps these shoes easy to reach without narrowing the aisle. 2. Reserve zone: clean, dry shoes used less often. Put them under the bed, inside a wardrobe, beneath a dinette seat, or in another existing compartment. 3. Dirty or wet zone: muddy boots, water shoes, and rain footwear. Use a ventilated tray under the awning when parked, or a cleanable container in an appropriate exterior bay if your RV manual permits that use.
This zoning stops the doorway from becoming the storage plan. If footwear still overwhelms all three zones, use our how to declutter your home guide on this category: does the pair fit, suit this trip, and earn its space?
Avoid assigning the stairwell itself as a zone. Interior steps must remain usable, and loose shoes can disappear beneath a pedal area or slide into the aisle. A location beside the door is useful only when the door, screen, latch, and walking path still operate fully.
Measure Before You Buy or Build
RV dimensions are rarely forgiving, and a product's outside dimensions matter more than the number of pairs shown in a listing. Measure with slides both in and out if the storage area is near moving cabinetry. Record the following before shopping:
- Clear width, height, and depth of the proposed location - Door and drawer swing, including handles and latches - Aisle width after installation, not just the empty wall width - Step, furnace-return, vent, detector, outlet, and control-panel clearances - Distance to the nearest emergency window or exterior door - Usable compartment opening, which may be smaller than the space behind it - Largest shoe dimensions, measured as a pair in the orientation you will store it - Loaded organizer weight, including boots, bin, hardware, and anything sharing the compartment - Slide travel path and anything that changes position between camp and transit
Mock up the organizer with painter's tape or cardboard. Open nearby doors, walk the aisle, operate the slide as directed by its manual, and test the bed. A rack fails if it catches a screen or makes an exit awkward. For more hidden-capacity ideas, see home organization ideas for small spaces and bedroom storage ideas.
12 RV Shoe Storage Ideas That Earn Their Space
Choose one or two ideas that match your rig rather than layering organizers onto every surface.
1. Secured entry tray
A low-sided rubber or plastic tray catches grit from the active pairs. Size it so it sits beside the walking line, not across it. At departure, place the tray in a latched compartment or restrain it using an approved anchor and method. A lip contains dirt but does not make a tray travel-safe by itself.
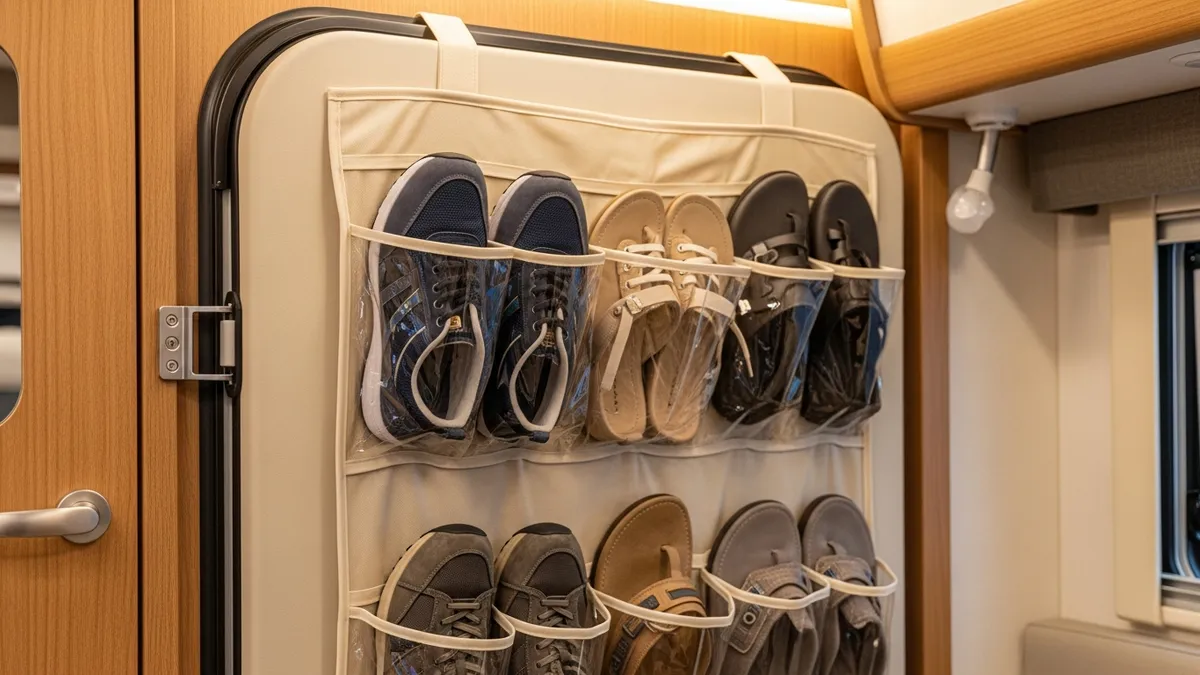
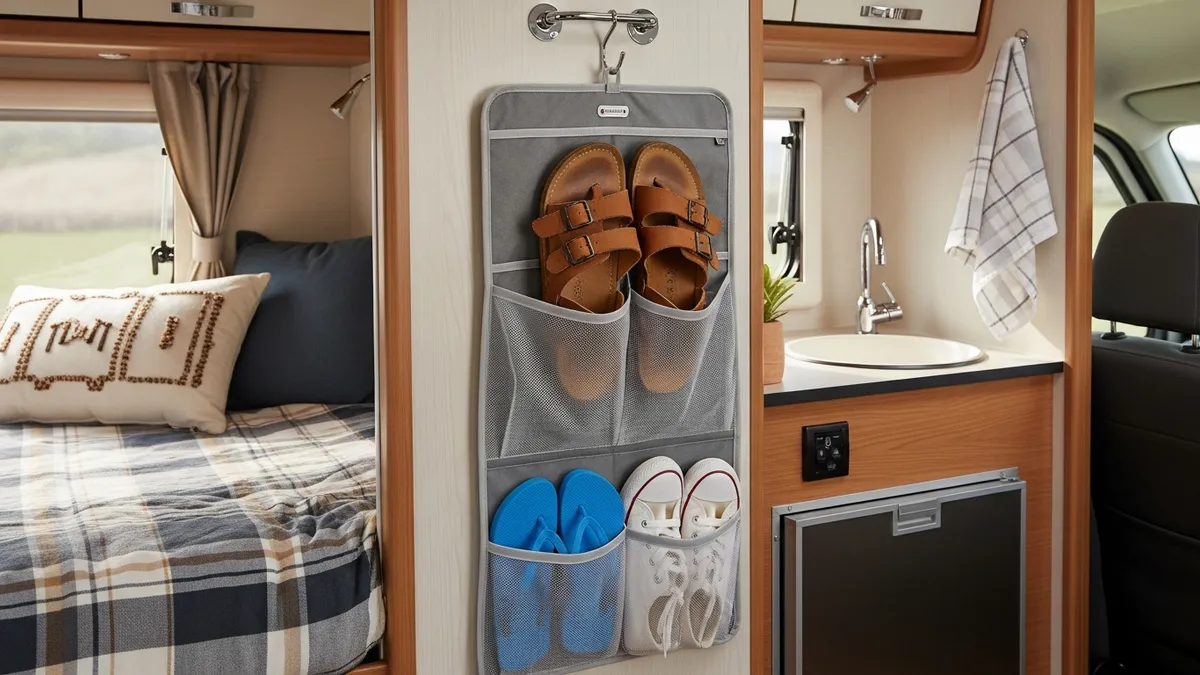
2. Door-pocket organizer
A fabric pocket panel can hold sandals and other light shoes without taking floor area. Confirm that the organizer cannot interfere with the door seal, latch, screen, window, or emergency operation. Remove it for travel if the door manufacturer or RV manual does not approve the mounting method or loaded weight.
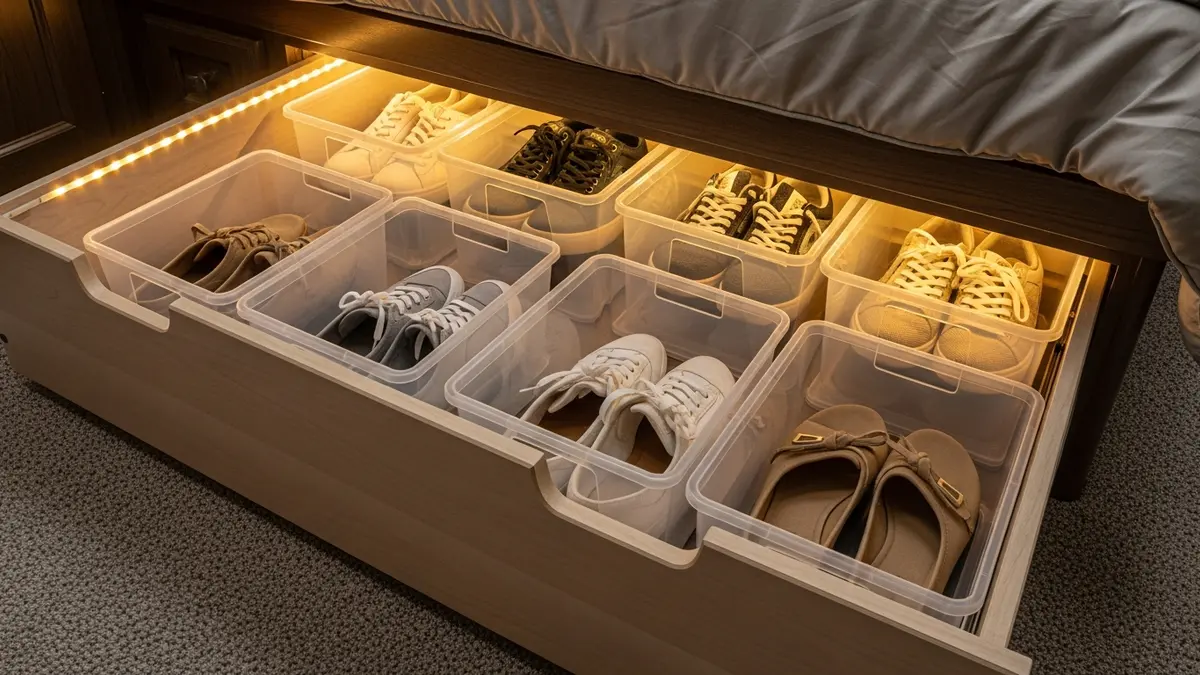
3. Under-bed lidded bins
Low bins are useful for clean reserve pairs. Choose handles you can reach without unloading the entire bay, and use dividers or soft packing cells so shoes do not migrate within a half-full bin. If the bed platform lifts, verify that added contents stay within the lift mechanism's limits and cannot contact wiring or moving hardware.
4. Wardrobe floor bin
A washable bin on the wardrobe floor keeps footwear below hanging clothes. A snug fit, cabinet latch, and internal divider can work together to control movement. Leave ventilation around dry shoes and do not stack footwear against plumbing, electrical equipment, or a heat source.
5. Hanging closet cells
Soft hanging cells suit light sandals, slippers, and low-profile shoes. Check the wardrobe rail and its supports before adding weight. Many RV rails are designed for clothing, so do not assume a long organizer packed with boots is acceptable.
6. Dinette or bench compartment
Existing seat-base storage can keep reserve footwear out of sight. Use a small removable tote instead of letting shoes scatter around utility lines. Inspect the compartment first; some benches contain electrical, heating, plumbing, or slide components that must remain accessible and unobstructed.
7. Soft-sided packing cubes
Separate shoe cubes or zip bags protect clean gear and make pairs easy to transfer between the RV, tow vehicle, and campsite. They compress only as far as the footwear allows, but their flexible sides fit irregular spaces better than rigid boxes. Our packing cubes guide offers more ways to group travel items without losing track of them.
8. Exterior-bay boot tote
A cleanable tote can isolate rugged footwear from the living area. First check the bay's intended use, load limit, weather sealing, and proximity to equipment. Never store wet shoes where dripping water can reach electrical components, and never use a compartment reserved for batteries, propane, a generator, or another system.
9. Narrow cabinet shelf riser
A lightweight riser can use the upper half of a tall cabinet. It should fit without stressing the cabinet walls and should be blocked or retained so it cannot walk forward in transit. Put lighter footwear above and denser footwear below.
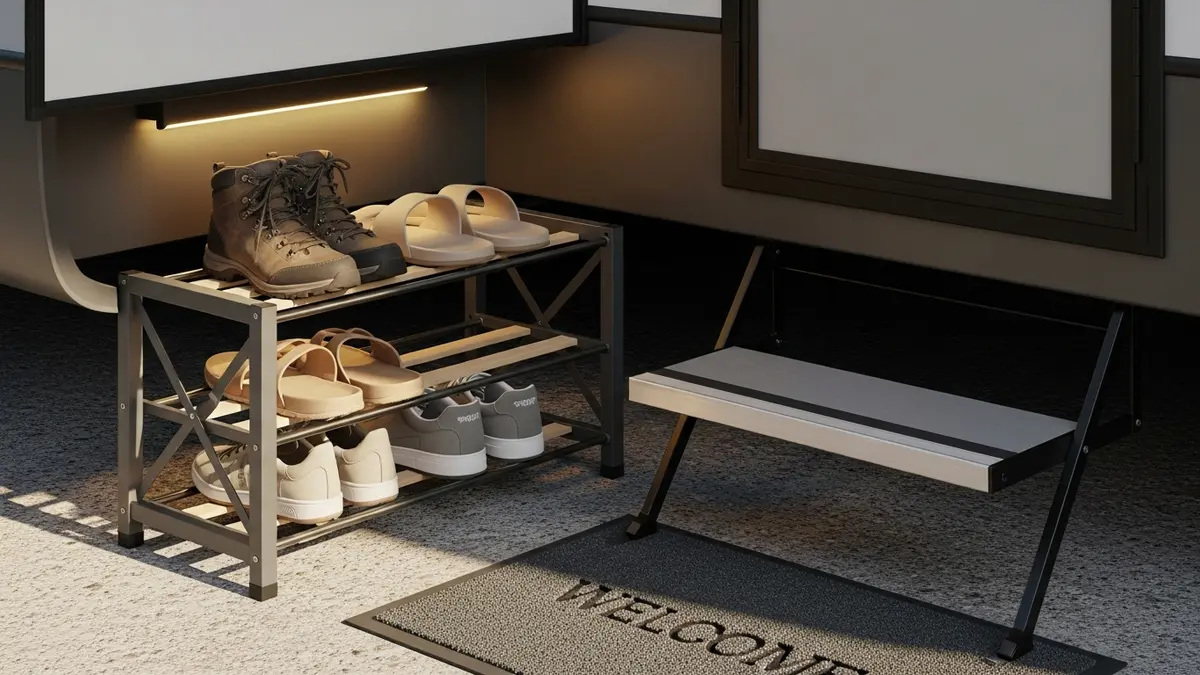
10. Removable parked-mode rack
A folding rack gives boots airflow under an awning or beside the door at camp. Label it as parked-mode gear in your routine. Before moving, fold it and stow it in a latched bay. This avoids relying on friction feet or a narrow base while underway.
11. Lightweight wall pockets on approved points
Wall pockets can use a factory-approved rail, existing hook, or other documented mounting point. Keep the load light and test door and slide clearances. Do not guess where studs, wires, plumbing, or structural members sit behind a thin wall.
12. Custom low cubby
A fitted cubby may work in a rig with a genuine unused recess, but it changes weight, airflow, access, and sometimes the structure. Make it removable when possible. Before fastening anything, ask the RV manufacturer or a qualified RV service professional about the exact wall, floor, and hardware. For fixed-home comparisons, our shoe storage cabinet ideas explain useful cabinet features, but residential furniture should not be assumed suitable for a moving RV.
Travel Mode and Parked Mode Need Different Rules
Write a two-column rule for every shoe item: where it lives at camp and where it lives while moving. A tray outside, folding rack under the awning, or basket beside the sofa can be excellent in parked mode. None should remain loose when the vehicle moves. Travel mode begins before hitching or releasing the parking brake, not after the first turn reminds you.
A practical departure reset is short: dry or bag dirty footwear, return daily pairs to their restrained container, fold the rack, latch cabinets, and walk from the bedroom to the main door without stepping around anything. Then check again after the first stop. Latches, hook-and-loop straps, tension devices, and bins can loosen or settle as the road surface changes.
Cargo rules for commercial vehicles do not automatically govern a private RV, but the design objective in the federal cargo securement regulation is still a sensible test: cargo should be contained, immobilized, or secured so shifting does not harm vehicle stability or maneuverability. For shoes, that means controlling both the organizer and its contents. A latched cabinet is not enough if a hard bin can slam against the door from inside.
Manage Weight and Distribution, Not Just Volume
Shoes and fabric pockets may feel minor, but every organizer and pair becomes part of the RV's cargo. Use the capacity labels and instructions for your specific vehicle, not a generic online allowance. The Thor Motor Coach manual hosted by NHTSA explains weighing, loading, GVWR, GAWR, and cargo carrying capacity, and tells owners not to exceed applicable ratings. Your own manual and labels remain controlling for your model.
Count the complete system: rack, hardware, bins, shoes, tray, and nearby cargo. Weigh the loaded RV in travel configuration when actual loading information is needed, then compare the result with its ratings and manufacturer guidance. Remaining total capacity does not permit overloading one axle, compartment, rail, or wall.
Store dense boots low and close to an appropriate existing storage location. Avoid concentrating every family member's footwear in one high rear cabinet merely because it is empty. Keep left-to-right balance and front-to-rear loading in mind, especially when moving footwear between an interior closet, rear pass-through, and tow vehicle. A shoe solution should use available capacity, not become the reason you ignore it.
Fasten Organizers Without Damaging the RV
Start with the vehicle documentation. Outdoors RV's public owner's manual says it does not recommend drilling, screwing, or riveting wall-hanging fasteners because wires or water lines may be concealed, and it warns that sticky-back products can damage panel surfaces. Northwood's owner's manual similarly tells owners to check with the dealer or factory before alterations because a drill, screw, or nail may reach an unseen LP-gas line or electrical circuit. These are manufacturer-specific instructions, but they show why a generic mounting tutorial is not enough.
Use this decision order:
- Prefer an existing, documented storage compartment with a positive latch. 2. Use factory-provided anchor points or rails only within their stated purpose and limit. 3. Ask the manufacturer or qualified service professional before drilling or modifying a wall, floor, cabinet, door, or bed base. 4. Follow the organizer and fastener instructions together, using the lower applicable load limit. 5. Test in travel configuration, then inspect for loosening, panel damage, chafe, and latch wear.
Adhesive hooks, magnets, tension rods, and hook-and-loop tape are not universal substitutes for structural fastening. Heat, cold, texture, dust, vibration, coating type, and loading direction can change their performance. A product rated on a smooth stationary household wall may not be approved for an RV panel or for dynamic travel loads. If approval is unclear, use it only as a parked-mode convenience and stow it before travel.
Keep Doors, Aisles, and Emergency Exits Clear
Do not mount or park shoe storage in front of the main door, a secondary escape window, a roof hatch intended for escape, a fire extinguisher, or the path needed to reach them. The public NFPA 1192 technical material addresses primary and secondary means of escape and clear paths in RVs. Exact requirements depend on the applicable standard and vehicle, but the owner's storage rule is simple: no shoe system should reduce an exit's opening, reach, or operation.
Check this in the dark as well as daylight. Can a sleeping occupant reach and operate the emergency window without first moving a shoe bin? Can everyone get from a bunk to the exterior door with slides in the travel position? Does an over-door organizer snag the screen or cover a latch? Keep the answer yes even when every pocket is loaded.
Also preserve access to safety equipment and utility panels. A neat row of bins is still the wrong solution if it hides a detector, blocks furnace return air, sits against a heater, or delays access to a shutoff. During your mock-up, operate each exit and point to each safety device without moving storage first.
Control Moisture, Dirt, and Odor at the Source
Do not seal wet shoes in a closed box and forget them. Knock off loose soil outside where permitted, remove insoles if the shoe maker allows it, and dry footwear in a ventilated location away from ignition sources and direct heat that could damage the shoe. The U.S. Environmental Protection Agency's mold guidance emphasizes drying wet or damp items quickly and notes that airflow and dehumidification can help. That guidance is broader than footwear, but the moisture principle applies inside a compact RV.
For active pairs, choose a tray you can remove, wash, and dry. For reserve pairs, breathable fabric or a vented container is usually easier to inspect than an opaque, tightly packed tote. Never add fragrance to disguise a moisture problem. Find the wet pair, leak, condensation source, or dirty tray, then clean and dry it.
Exterior bays also need inspection. A weather seal does not guarantee that a compartment is dry, and temperature changes can create condensation. Check shoe totes after rain, washing, and long travel days. If the RV itself has persistent dampness, address the source according to the vehicle manual rather than treating shoe storage as an isolated odor issue. Our broader home storage ideas can help you organize cleaning and inspection supplies without crowding the footwear zone.
Choose Products by Function, Not Pair Count
Product listings often lead with capacity, but an RV owner should begin with fit, restraint, and cleanability. Use this checklist before buying:
- Exact outside dimensions in the intended loaded orientation - Loaded weight and stated limit for the organizer and mounting method - Positive closure or restraint for travel - Washable tray or removable liner for dirty pairs - Ventilation for footwear that is fully dry but benefits from airflow - Rounded edges and quiet contact points that will not chafe nearby finishes - Access with slides in and out - No interference with exits, latches, vents, utilities, or safety equipment - Manufacturer approval for any attachment or alteration - Easy travel reset, ideally possible in a few deliberate actions
Treat tall towers, residential over-door racks, open shelves, and heavy benches cautiously. They require a separate assessment for dynamic loads, attachment points, capacity, and escape paths. A soft bin in an existing latched cabinet often works better with the vehicle.
If you are reducing a larger collection for a compact rig, see small closet organization ideas and storage ideas for small spaces. Both reinforce the useful principle here: assign the limited space first, then choose what fits within it.
Build a Repeatable Setup and Departure Routine
Test the smallest workable system for a full camp cycle. Notice where shoes land, which pairs stay damp, and what becomes hard to reach. Adjust the zone rather than adding another overflow basket.
A simple routine keeps the system reliable:
- On arrival: deploy only parked-mode storage, set out the active tray, and keep the aisle open. - After outdoor use: separate muddy or wet pairs, clean the tray, and begin drying promptly. - The night before departure: return reserve pairs to their divided bins and remove unnecessary footwear. - Before moving: stow the rack, restrain containers, latch compartments, clear exits, and inspect the floor around pedals and steps. - At the first safe stop: recheck straps, latches, and anything newly installed. - After the trip: empty, clean, and fully dry bins before long storage.
This approach keeps RV shoe storage predictable for couples, families, weekend travelers, and full-time owners without pretending they all need the same product. The best system is the one your vehicle can safely carry and your household can reset every time.
FAQ
What is the best RV shoe storage idea for a small camper?
Begin with one shallow washable tray for active shoes and one soft, divided bin inside an existing latched compartment for reserve pairs. This uses storage the RV already provides, limits loose objects, and avoids permanent wall changes. Confirm that the tray does not narrow the aisle, then stow or restrain it before travel.
How do I keep shoes from sliding while the RV is moving?
Control the organizer and the shoes inside it. Put divided containers in a latched compartment, fill empty space with lightweight dividers, and use only manufacturer-approved anchors or restraints. A non-slip liner may reduce small movement, but friction alone is not a positive travel restraint. Recheck the setup after the first stop.
Can I hang a shoe organizer on an RV door?
Only if it does not affect the door, screen, seal, latch, window, exit function, or allowed load, and the RV and door instructions permit it. Lightweight pockets may be practical while parked. If travel use or mounting approval is unclear, remove and stow the organizer before moving.
Is it safe to drill into an RV wall for a shoe rack?
Do not drill based on guesswork. RV walls can conceal electrical wiring, plumbing, gas lines, framing, and other components, and manufacturers may restrict alterations. Check your exact manual and contact the manufacturer, dealer, or qualified RV service professional before making holes or selecting hardware.
Where should heavy hiking boots be stored?
Keep them low in an appropriate existing compartment where their loaded weight is within the compartment and vehicle limits. Use a cleanable, restrained tote and avoid concentrating heavy footwear high on a wall or at one extreme end of the rig. If wet, dry the boots before placing them in long-term enclosed storage.
Can shoes go in an exterior RV storage bay?
They can if the bay manual permits general cargo, the tote stays within the bay's limit, and the location is dry and separated from equipment that requires clearance. Do not put dripping shoes near electrical components or in a compartment intended for propane, batteries, a generator, or other dedicated systems.
How do I prevent mold and odor in RV shoe storage?
Remove dirt, dry shoes promptly, clean and dry the tray, and avoid tightly packing damp footwear. Use ventilation or dehumidification as appropriate for the RV and climate, following vehicle and appliance instructions. Persistent odor usually calls for finding moisture or soil, not adding scent to the bin.
How many pairs of shoes should each person bring?
There is no universal number. Give each traveler a defined volume, list the activities and weather expected, and choose the smallest set that covers those needs. Wear the bulkiest suitable pair on travel days when practical, and remove duplicates that serve the same purpose.
Should an RV shoe rack stay out while driving?
A freestanding or folding rack should normally be treated as parked-mode equipment unless the RV manufacturer approves the installation and it has a travel restraint suitable for its loaded condition. Fold and stow it in a latched compartment before departure, then include it in the pre-drive walk-through.
Liked this guide?
Get new organizing guides and the occasional new product by email. No spam, unsubscribe anytime.
Related articles

Explore more articles
- How to Organize Your Closet: A Practical 2026 Guide
- Minimalist Kitchen Organization: 2026 Guide
- Home Storage Solutions: 2026 Guide to a Tidy Home
- Minimalist Kitchen Decor Ideas: 25+ Modern Looks 2026
- 30+ Brilliant Small Space Kitchen Storage Ideas to Maximize Every Inch in 2026
- Bathroom Storage Ideas to Keep a Small Bathroom Tidy
- DIY Wall Shelf Ideas: Budget-Friendly Storage
- Minimalist Shoe Rack for Your Home's Foyer