
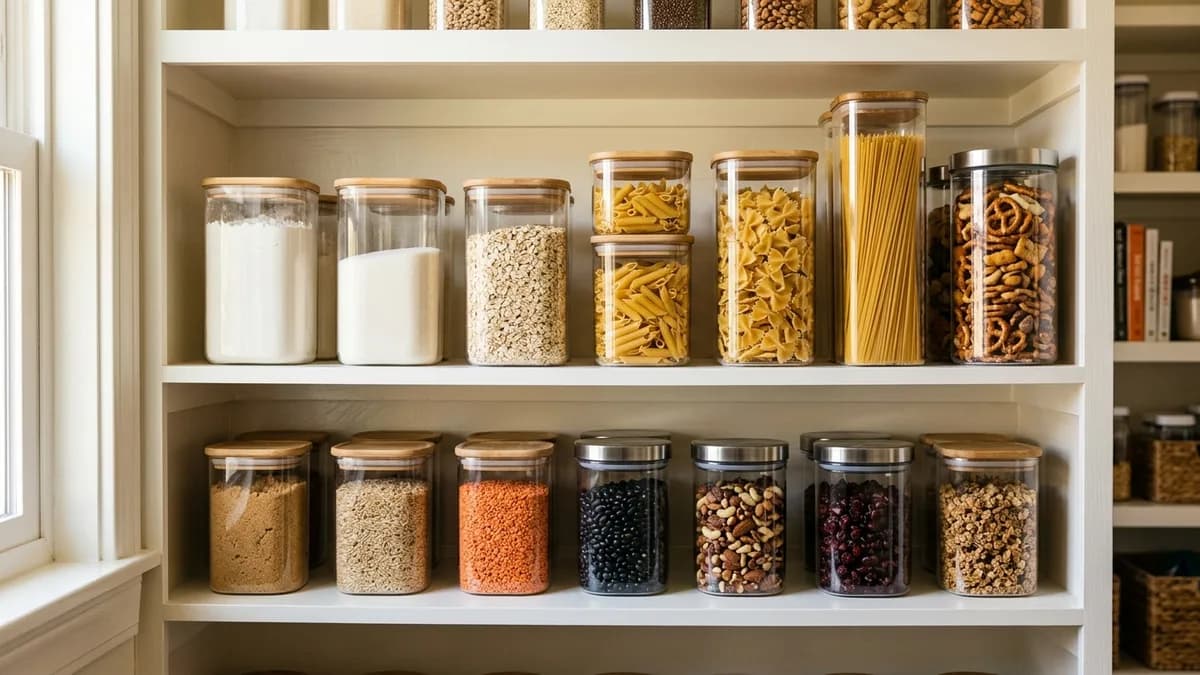
Pantry Food Storage Containers: The Complete 2026 Tutorial Guide to a Beautifully Organized Kitchen
If your pantry feels more like a chaotic jumble of half-open bags, mismatched boxes, and forgotten cans than a functional food storage space, you are not alone. The good news is that the right pantry food storage containers can completely transform the way your kitchen looks, feels, and functions. In this step-by-step tutorial, I will walk you through everything you need to know in 2026: which container types work best for specific foods, how to set up a system that actually sticks, and the practical habits that keep your pantry looking great week after week.
Why Pantry Food Storage Containers Make Such a Big Difference
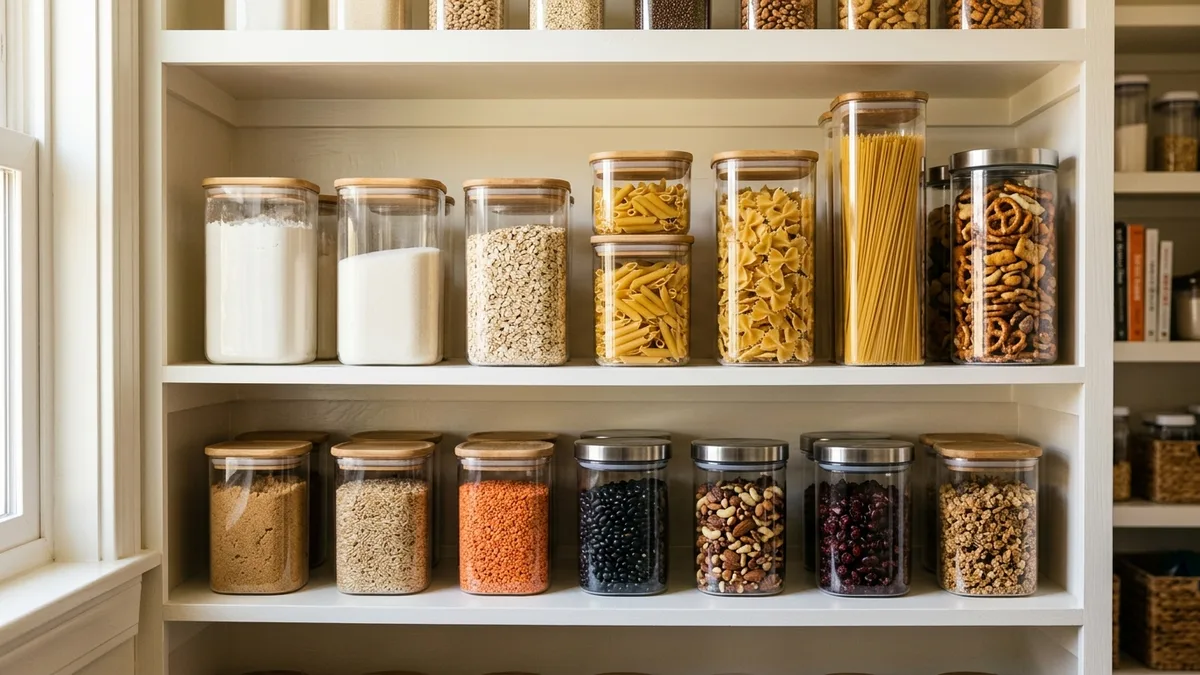
Before we get into the how-to steps, it helps to understand why investing in dedicated pantry food storage containers pays off so well. According to The Spruce, a well-organized pantry not only looks better but also helps you reduce food waste because you can actually see what you have before it expires. That alone is a compelling reason to make the switch from original packaging to uniform containers.
Beyond reducing waste, quality pantry containers create an airtight barrier that keeps pests, humidity, and air away from your dry goods. Flour, sugar, cereal, pasta, rice, and snacks all stay fresher significantly longer when stored in sealed containers versus their original paper or cardboard packaging. And from a practical standpoint, uniform containers stack neatly, fit more product on each shelf, and make your entire pantry look intentional and calm rather than cluttered.
I also find that a well-contained pantry saves real money over time. When everything is visible and accessible, you stop buying duplicates of items you already have tucked behind something else.
Step 1: Empty and Assess Your Pantry Before You Buy Anything
This is the most important step that most people skip, and it is why so many pantry organization attempts fail. Before you purchase a single pantry food storage container, you need to fully empty your pantry and take stock of what you actually have.
What to Do During Your Pantry Audit
- Pull everything off every shelf and spread it out on your kitchen table or counter.
- Check every expiration date and discard anything that is past its prime.
- Group items by category: baking supplies, grains and pasta, canned goods, snacks, cereals, oils and vinegars, spices, and so on.
- Measure the depth, width, and height of each pantry shelf so you know exactly what dimensions your containers need to fit.
- Note how many units of each food category you typically keep on hand at once, because this tells you how many containers and what sizes you will need.
Taking this audit step seriously saves you from buying containers that are the wrong size or buying too many or too few. Write down your shelf measurements and your category quantities before you shop. It sounds basic, but this 30-minute investment makes the rest of the process much smoother.
Step 2: Choose the Right Type of Pantry Food Storage Container for Each Category
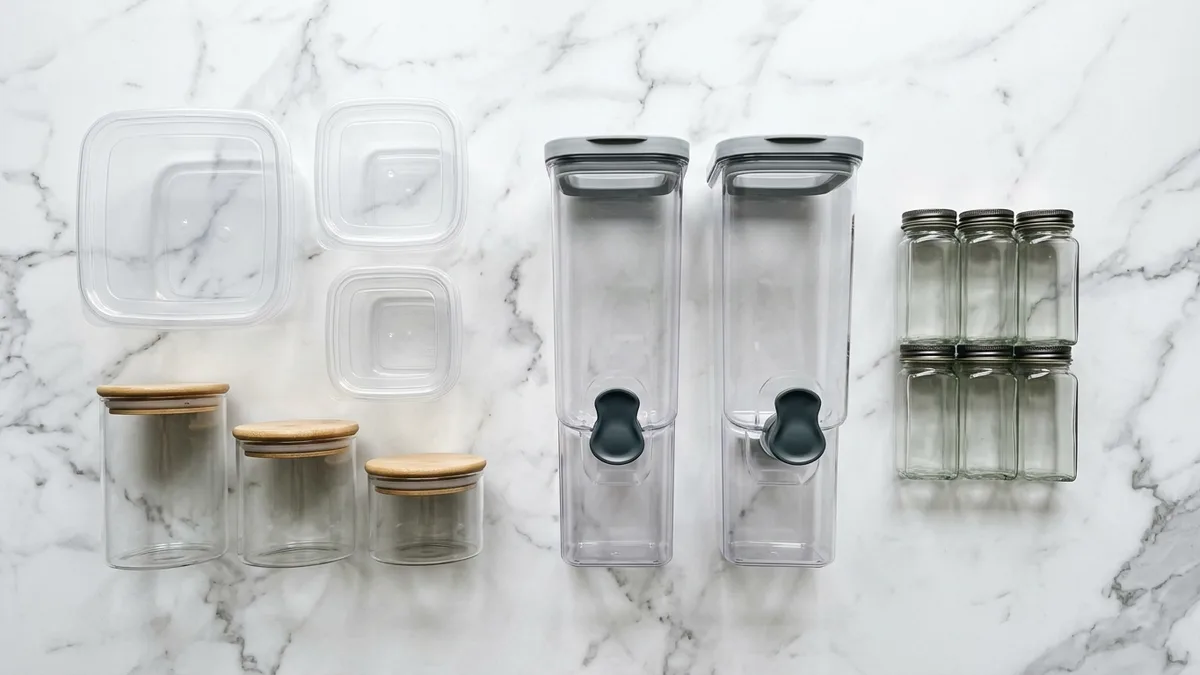
Not all pantry food storage containers are created equal. Different foods have different storage requirements, and matching the right container type to the right food is the key to keeping everything fresh and accessible. Here is a breakdown of the main container types and where they shine.
Clear Airtight Plastic Containers
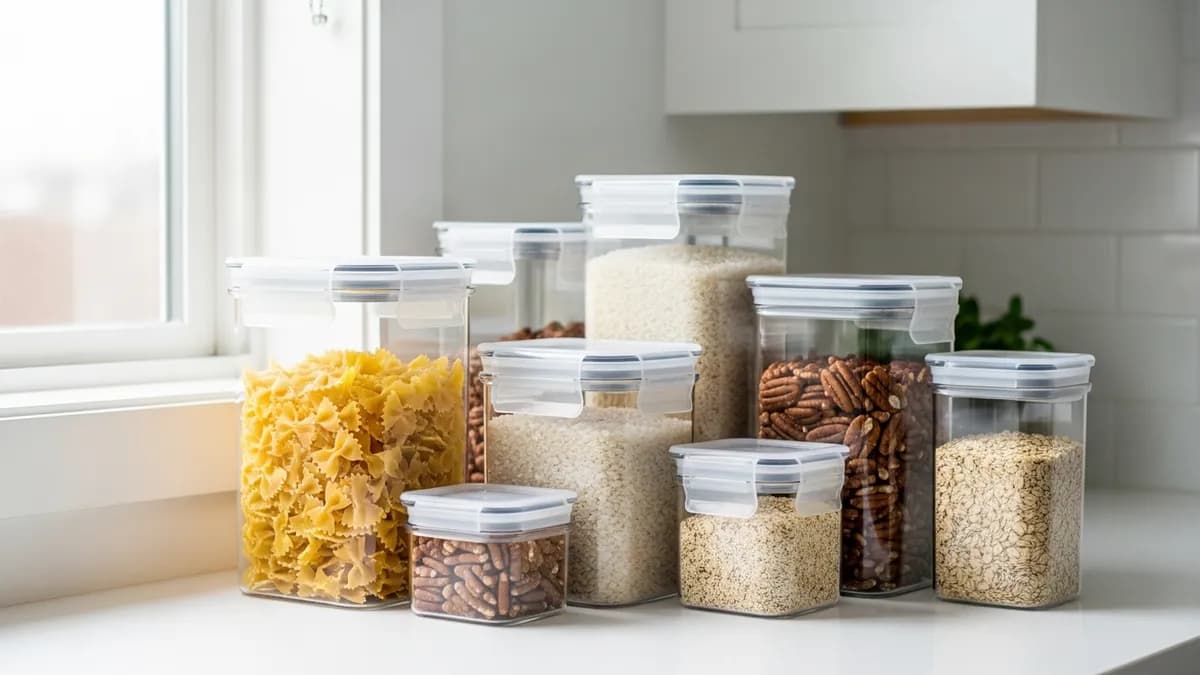
Clear, BPA-free airtight plastic containers are the workhorse of most well-organized American pantries. They are lightweight, shatterproof, available in a huge range of sizes, and typically the most budget-friendly option. They work best for:
- Flour, sugar, and other baking essentials
- Rice, quinoa, lentils, and other grains
- Pasta and noodles
- Dried beans and legumes
- Oats and granola
- Snack mixes and crackers
Look for containers with a gasket-sealed lid that creates a true airtight closure. Square and rectangular shapes are far more space-efficient than round containers because they sit flush against each other with no wasted gap space between them. If you want to learn more about what makes a container truly airtight, our guide on air tight food storage containers covers the topic in depth.
Glass Jars with Airtight Lids
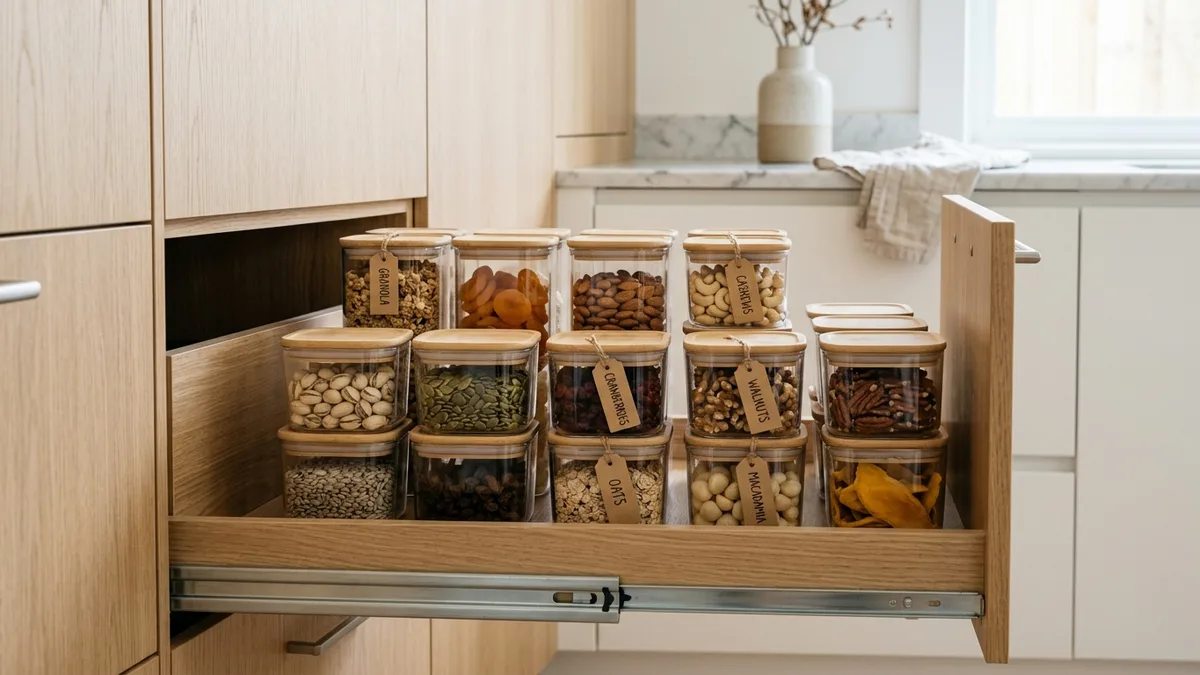
Glass containers are a premium choice for pantry organization. They do not absorb odors, they do not stain, and they give your pantry a clean, upscale aesthetic. Wide-mouth glass jars with bamboo, stainless steel, or plastic airtight lids are perfect for:
- Nuts and seeds
- Dried fruits
- Coffee and tea
- Specialty flours like almond flour or coconut flour
- Candy and chocolate
- Honey and nut butters (in the pantry before opening)
The main downside of glass is weight and fragility, so keep heavier glass containers on lower shelves where they are less likely to fall and where they are easier to lift safely. For a full breakdown of glass options, check out our best food storage containers glass guide.
Tall Cereal and Dry Goods Dispensers
Tall, slender containers with a flip-top or pour spout are designed specifically for breakfast cereals, but they work equally well for popcorn kernels, pretzels, and other bulky snacks. They typically hold between 135 and 175 ounces and are designed to stand upright on a shelf without tipping.
Small Spice and Seasoning Jars
While spices technically belong in a spice organization system, many pantries also need small uniform jars for packets of seasoning mixes, bouillon cubes, and dried herbs kept in bulk. Matching small glass or clear plastic jars keep these items from getting lost in a pile. Our spice storage containers guide offers great complementary ideas for this category.
Stackable Modular Sets
If shelf space is limited, stackable container sets that interlock are a game changer. These are designed so that the lid of one container doubles as a stable platform for the next container, letting you build upward rather than spreading outward. They work especially well in shallow pantries or on shelves with a lot of vertical clearance.
Step 3: Calculate How Many Containers You Need and What Sizes to Buy
This is where your pantry audit notes come in. Use the category groups and shelf measurements you wrote down to plan your container purchases with precision. Here is a practical sizing guide for the most common pantry staples in a typical American household:
- Extra-large containers (1.5 to 2 gallons): Ideal for all-purpose flour, bread flour, sugar, and large pasta quantities
- Large containers (0.5 to 1 gallon): Great for rice, rolled oats, granola, dried beans, and coffee beans
- Medium containers (1 to 2 quarts): Perfect for quinoa, specialty grains, nuts, dried fruit, and pasta shapes
- Small containers (0.5 to 1 quart): Best for seeds, small snacks, bouillon cubes, cocoa powder, and powdered sugar
- Mini containers (4 to 8 ounces): Ideal for individual spice refills, baking powder, baking soda, and yeast packets
I recommend buying a matching set from the same product line whenever possible. Matching containers create a visually cohesive pantry and are designed to stack and nest together efficiently. Mixing different brands often leads to awkward gaps and unstable stacking.
Pro tip: When in doubt, size up. It is far better to have a little extra space in a container than to have a bag of flour that does not fit, because that leftover flour will end up sitting in its open original bag right next to your beautiful new containers.
Step 4: Set Up Your Pantry Zones for Maximum Efficiency
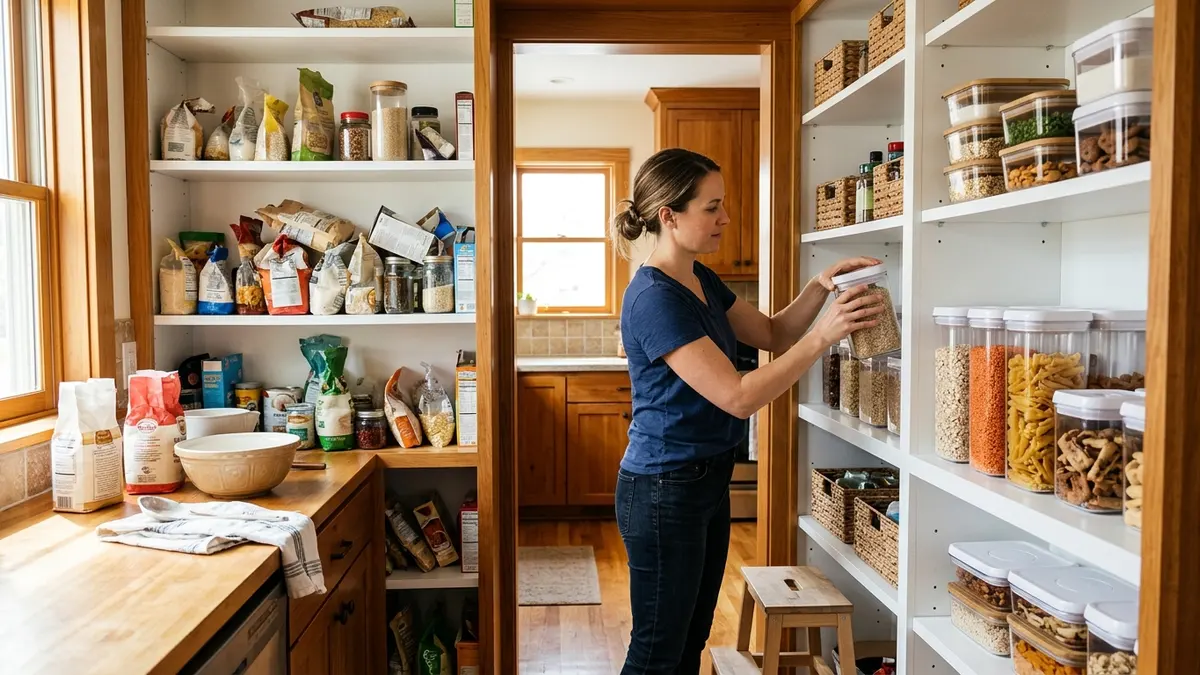
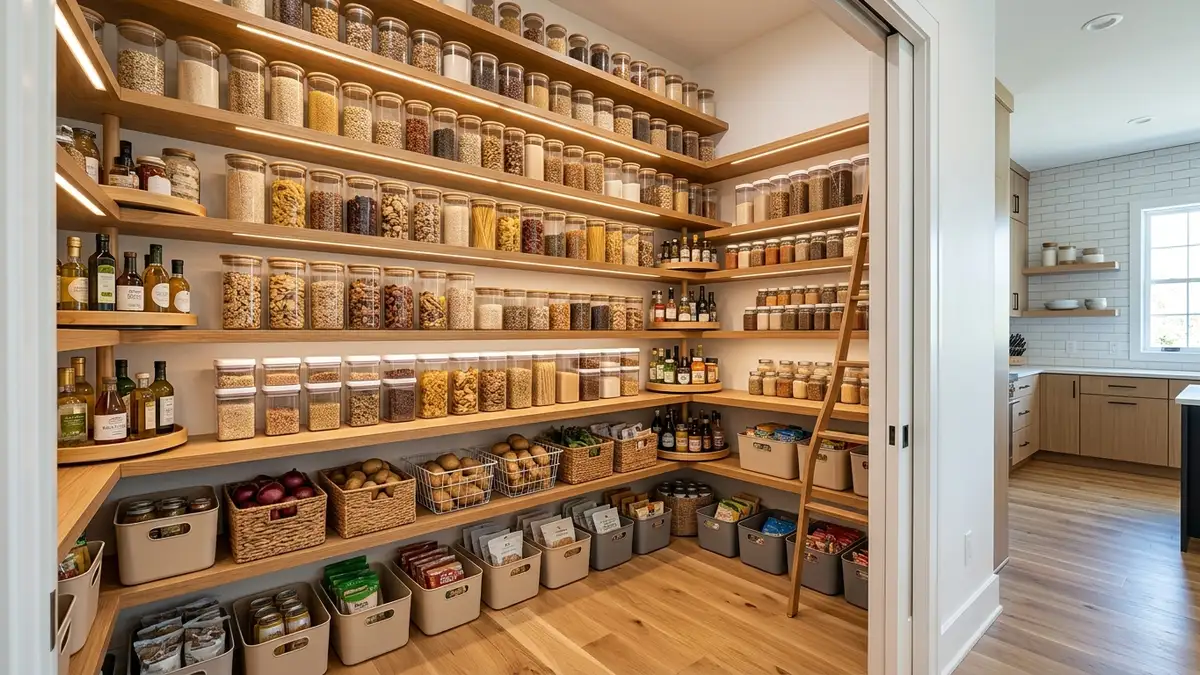
With your containers selected and on hand, it is time to set up a zone-based system on your shelves. This is where your pantry transforms from a storage closet into a genuinely functional kitchen tool. The zone approach means grouping related items together so that everything you need for a specific task lives in the same area.
Recommended Pantry Zone Layout
Eye-level zone (most accessible): This is prime real estate. Stock it with your most frequently used items like everyday cooking oils, the grains you eat most often, your most-used canned goods, and snacks. These are the things you reach for multiple times a week.
Upper shelves: Store items you use less often but still need regular access to, such as specialty flours, baking supplies, and bulk quantities of items you buy in advance.
Lower shelves: Use these for your heaviest items, including large glass containers, heavy cans, and large bulk bags stored inside containers. Lower shelves are also a great spot for a basket or bin that holds onions, potatoes, or other produce that does not need refrigeration.
Door or side shelves (if available): Perfect for small items like spice packets, hot sauce bottles, condiment packets, and single-serve items.
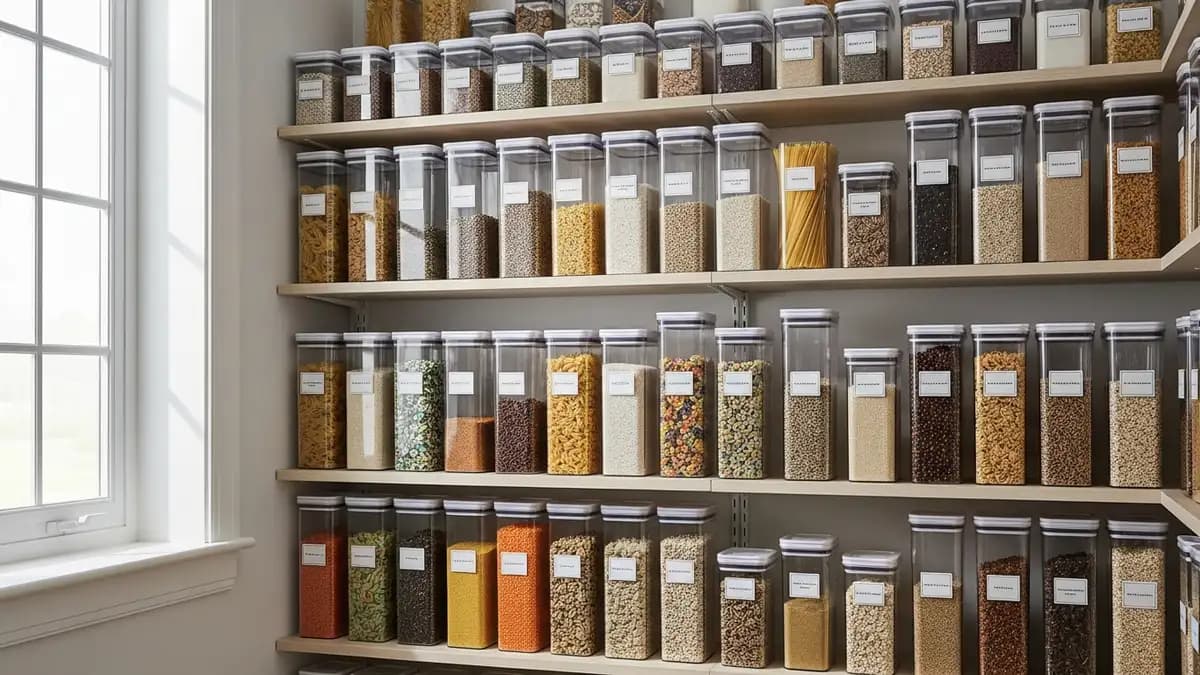
Within each zone, arrange containers so that the labels face outward. This sounds obvious, but it makes a genuinely dramatic difference in how fast you can find what you need when you are in the middle of cooking.
How to Handle Deep Shelves
Deep pantry shelves are notorious for creating a dead zone at the back where food disappears and gets forgotten. The best solution is to use a turntable (also called a lazy susan) at the back of deep shelves so you can spin items forward without reaching all the way to the back. You can also use tiered shelf risers to create a stadium-style arrangement where items in the back are elevated enough to be visible over the items in front.
For more zone-based pantry layout ideas, the Good Housekeeping pantry organization resource is a fantastic reference.
Step 5: Label Every Single Container Without Exception
Labeling is non-negotiable. Even if you think you will remember what is in each container, you absolutely will not three months from now when the pantry has been restocked and reorganized a dozen times. And if anyone else in your household uses the pantry, labels are the only way to make the system work for everyone.
Labeling Best Practices for Pantry Food Storage Containers
- Label the container itself, not just the lid. Lids get swapped accidentally, and a label on the lid alone will mislead you.
- Include the contents name and the use-by or best-by date. You can write the date in small text below the main label.
- Use a consistent label style. Chalkboard labels, clear labels with printed text, or simple white rectangle labels with a marker all work well. The key is consistency so the pantry looks unified.
- Place labels at the same height on every container. This creates a visual line across your shelf that is easy to scan at a glance.
- Re-label when you refill. Update the date every time you add new product to a container.
Printable label templates are widely available online if you want a polished look without buying a label maker. Our article on storage bin labels has practical label system advice that applies directly to pantry containers.
Step 6: Fill, Stock, and Maintain Your Pantry System
Now comes the satisfying part. Fill each container with its designated food, seal it properly, and place it in its assigned zone with the label facing forward. Work through one category at a time so you do not get overwhelmed.
Filling Tips to Get the Most Out of Your Containers
- Do not overfill. Leave about an inch of headspace so lids seal properly and contents do not spill when you open the container.
- For items like flour and sugar that compress over time, tap the container gently on the counter to settle the contents before sealing.
- Store multiple containers of the same item together with the newest purchase at the back and the older stock at the front. This is the FIFO method (first in, first out) that grocery stores use, and it dramatically reduces food waste.
- For items that come in large bulk bags, decant what fits comfortably into your pantry container and store the remainder of the bag in your garage, basement, or a cabinet, clearly labeled.
Building the Habit of Maintenance
The biggest reason pantry organization fails is not the initial setup. It is the lack of a maintenance routine. Here is a simple habit loop that keeps your pantry functioning well all year:
- Weekly (5 minutes): Before your grocery run, do a quick scan of your pantry. Note what is running low and what needs to be restocked. Return any items that ended up out of place.
- Monthly (15 minutes): Check expiration dates, wipe down shelves and the exterior of containers, and reorganize anything that has shifted.
- Quarterly (30 minutes): Do a mini pantry audit. Pull everything out of one zone at a time, check for expired items, and re-evaluate whether your current container sizes and zone setup are still working for your household.
For more tips on maintaining a functional kitchen organization system, our how to keep your kitchen organized guide is a great companion read.
The Best Materials for Pantry Food Storage Containers in 2026
With so many options on shelves and online, it helps to have a clear picture of how the main materials compare so you can choose the best pantry food storage containers for your specific needs and budget.
Clear BPA-Free Plastic
Pros: Lightweight, shatterproof, affordable, available in the widest range of sizes, transparent so contents are always visible, often dishwasher safe on the top rack.
Cons: Can absorb odors over time with strongly scented foods, may scratch and cloud up after extended use, and some lower-quality plastics can warp in high heat.
Best for: Everyday dry goods, grains, pasta, cereals, and snacks. This is the most practical choice for the bulk of most pantries.
Borosilicate Glass
Pros: Does not absorb odors or stains, looks beautiful, completely inert so it will never leach anything into food, very durable if handled carefully, often oven and microwave safe.
Cons: Heavy, can break if dropped, more expensive than plastic, limited size options for very large bulk storage.
Best for: Nuts, seeds, dried fruits, coffee, tea, specialty items, and any food with a strong aroma or color that might stain plastic.
Stainless Steel
Pros: Extremely durable, completely opaque which protects light-sensitive foods, does not absorb odors, eco-friendly and long-lasting.
Cons: Opaque so you cannot see contents at a glance, typically more expensive, and not microwave safe.
Best for: Keeping light-sensitive foods like certain spices, coffee, and specialty grains in optimal condition. Our stainless food storage containers guide explores this option in detail.
Ceramic and Crock-Style Containers
Pros: Beautiful countertop presentation, good for items you access daily like sugar and coffee, blocks light effectively.
Cons: Heavy, opaque, usually not airtight, limited size range, and better suited for countertop display than deep pantry shelf storage.
Best for: Open shelving and countertop display rather than inside a closed pantry.
According to Real Simple, the most important feature to look for regardless of material is a proper airtight seal, since that single factor has the most impact on how long your pantry staples stay fresh.
Common Pantry Food Storage Container Mistakes to Avoid
Even with the best intentions, there are a handful of mistakes that I see come up repeatedly when people set up their pantry container systems. Knowing these in advance saves you from having to redo your work.
- Buying containers before measuring your shelves. Always measure first. A set of containers that is even half an inch too tall for your shelf is useless.
- Choosing style over function. A container that looks gorgeous but has a flimsy lid seal is not doing its job. Prioritize airtight performance first, then aesthetics.
- Mixing too many different container styles. Using three or four different container lines creates visual chaos and means nothing stacks with anything else. Pick one or two compatible lines and stick with them.
- Skipping the labeling step. This always comes back to haunt you. Label everything, every time.
- Putting everything in containers right away without editing. If you decant expired or nearly expired food into a beautiful new container, you are just making your waste look prettier. Always audit before you decant.
- Forgetting to account for canned goods and non-container items. Pantry food storage containers work best as part of a complete pantry system that also includes baskets for produce, risers for cans, and lazy susans for deep shelves. Browse our 30+ best pantry cabinet ideas for the full picture.
Related Products from Sesoris
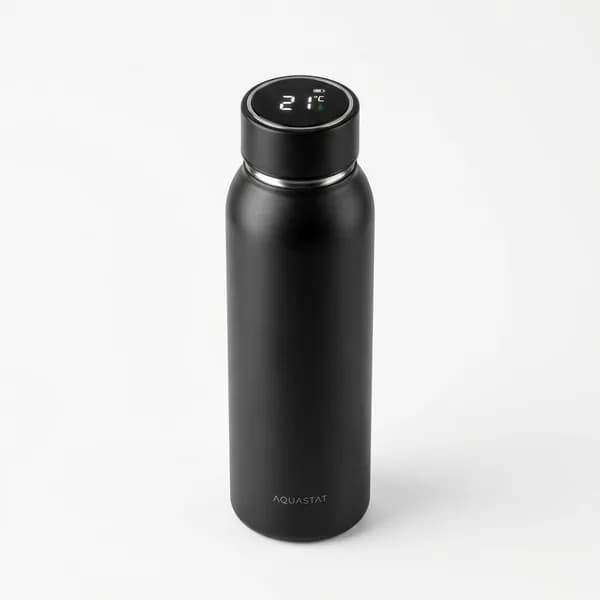
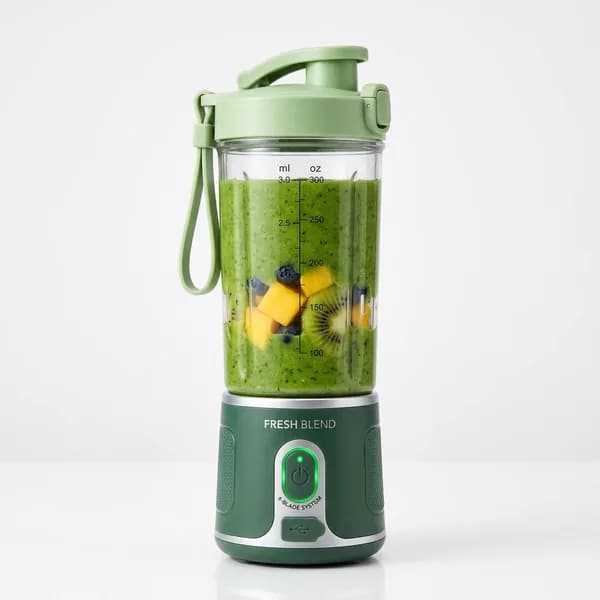
If you want to turn this guide into a real setup, start with Stainless Steel 2-Tier Dish Rack and Portable Blender. For broader options, browse the Kitchen & Dining collection so the article journey does not stop at reading only.
Our practical rule: choose one product that solves the main clutter problem first, then add supporting organizers only when the daily workflow is already clear. This keeps the shopping path useful, not pushy.
FAQ: Frequently Asked Questions About Pantry Food Storage Containers
Q: How do I know what size containers to buy for my pantry?
Start with your pantry audit measurements and your typical purchase quantities. A standard 5-pound bag of all-purpose flour fits comfortably in a 1.5-gallon container. A 2-pound bag of pasta fits in a 1-quart container. A pound of rice fits in about a 1-quart container as well. When in doubt, choose the next size up so you have a little room.
Q: Is it safe to store food long-term in plastic containers?
Yes, as long as you choose BPA-free, food-grade plastic containers. Look for the BPA-free label and check that the container is rated for food contact. Our detailed BPA-free food storage containers guide covers what to look for on product labels.
Q: How do I stop my pantry containers from getting sticky or grimy on the outside?
Wipe containers down with a damp cloth during your monthly maintenance check. For stickier residue, a small amount of dish soap on a damp cloth works well. Make sure containers are completely dry before you put them back on the shelf to prevent moisture buildup.
Q: Can I put pantry containers in the dishwasher?
It depends on the material and the specific product. Most BPA-free plastic containers are top-rack dishwasher safe. Glass containers are usually dishwasher safe but check the manufacturer guidance. Wooden and bamboo lids should always be hand washed. Stainless steel containers are typically hand-wash recommended to preserve the finish.
Q: What is the best way to organize a small pantry with pantry food storage containers?
For a small pantry, prioritize stackable containers to build vertically, use the inside of the pantry door with an over-door organizer for small items, and choose square or rectangular containers over round ones to eliminate wasted space. Our small pantry organization ideas article has detailed tips for compact spaces.
Q: How often should I clean my pantry storage containers?
Give containers a wipe-down on the outside monthly. Wash them thoroughly with dish soap and warm water each time you empty them completely before refilling. This prevents buildup, odor transfer, and contamination between product batches.
Conclusion
Setting up a functional, beautiful pantry using the right pantry food storage containers is one of the most rewarding kitchen organization projects you can tackle. When every shelf is stocked with clearly labeled, uniform containers that keep your food fresh and visible, cooking and meal planning become genuinely easier and more enjoyable. The system I have outlined here works whether you have a large walk-in pantry or a single deep cabinet. Start with your audit, choose your containers based on your actual food categories and shelf dimensions, set up smart zones, label everything, and build a simple maintenance habit. That is truly all it takes.
Ready to find the perfect containers for your pantry? Explore the full range of kitchen and pantry organization products at Sesoris to find everything you need to live more organized. From airtight containers to shelf risers and label sets, our collections are curated specifically to help American households build pantries that actually work. Check out our best sellers and new arrivals to get started today.
Weekly Home Tips
Get home organization ideas, product picks, and exclusive deals delivered weekly.
No spam. Unsubscribe anytime.
Explore More Articles
- Eid Gift Hamper Ideas with Home Essentials
- Bedroom Wall Shelf Ideas for Small Spaces
- 35+ Brilliant Small Space Clothing Storage Ideas to Maximize Your Wardrobe in 2026
- Blanket Storage Ideas for the Living Room
- 25+ Creative Walk In Pantry Organization Ideas to Transform Your Kitchen Storage in 2026
- Dish Rack Above Sink: Ultimate Guide to Kitchen Space Organization
- DIY Wooden Spice Rack: Step-by-Step Guide
- 25 Creative Wall to Wall Shelf Ideas That Transform Your Home Storage in 2026